Overview
-
The Games Institute VPN service provides secure Internet communications to Games Institute networks for Faculty, staff and students with WatGamer credentials. The service uses open-source OpenVPN TLS VPN hosted on Games Institute servers allowing users on a wide variety of platforms to establish an
encrypted tunnel to gi-gateway.watgamer.uwaterloo.ca and WATGAMER systems.
WATGAMER systems can be reached in the VPN tunnel via their IP address eg. gi-gateway=192.168.128.1
Detailed instructions are provided below for the most popular client options. If you cannot find instructions for your device or require a custom solution, be sure to contact the GI IT Support Team (gi-it@artsservices.uwaterloo.ca).
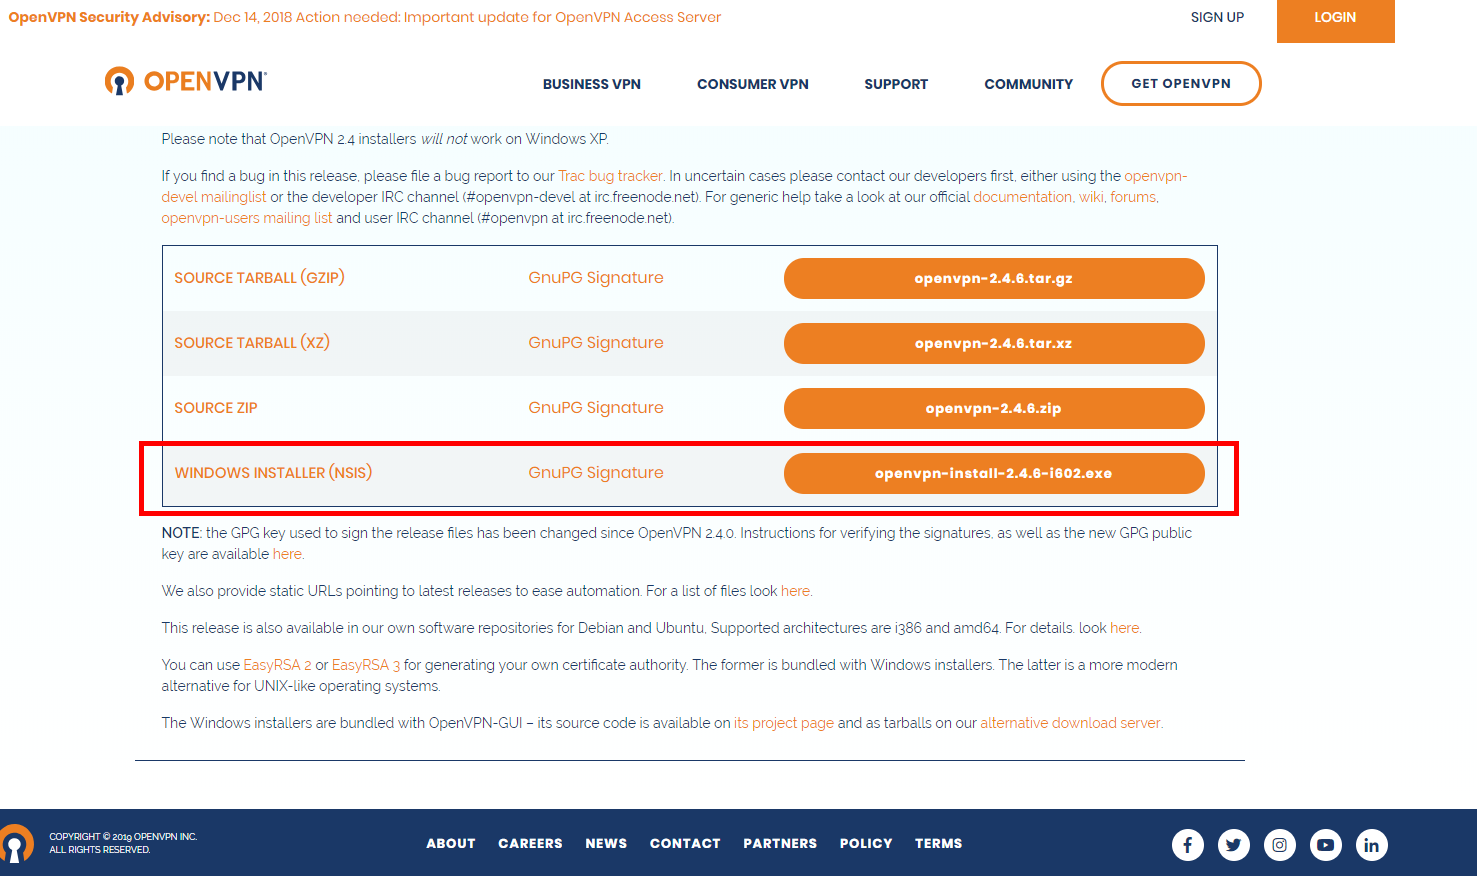
Downloads
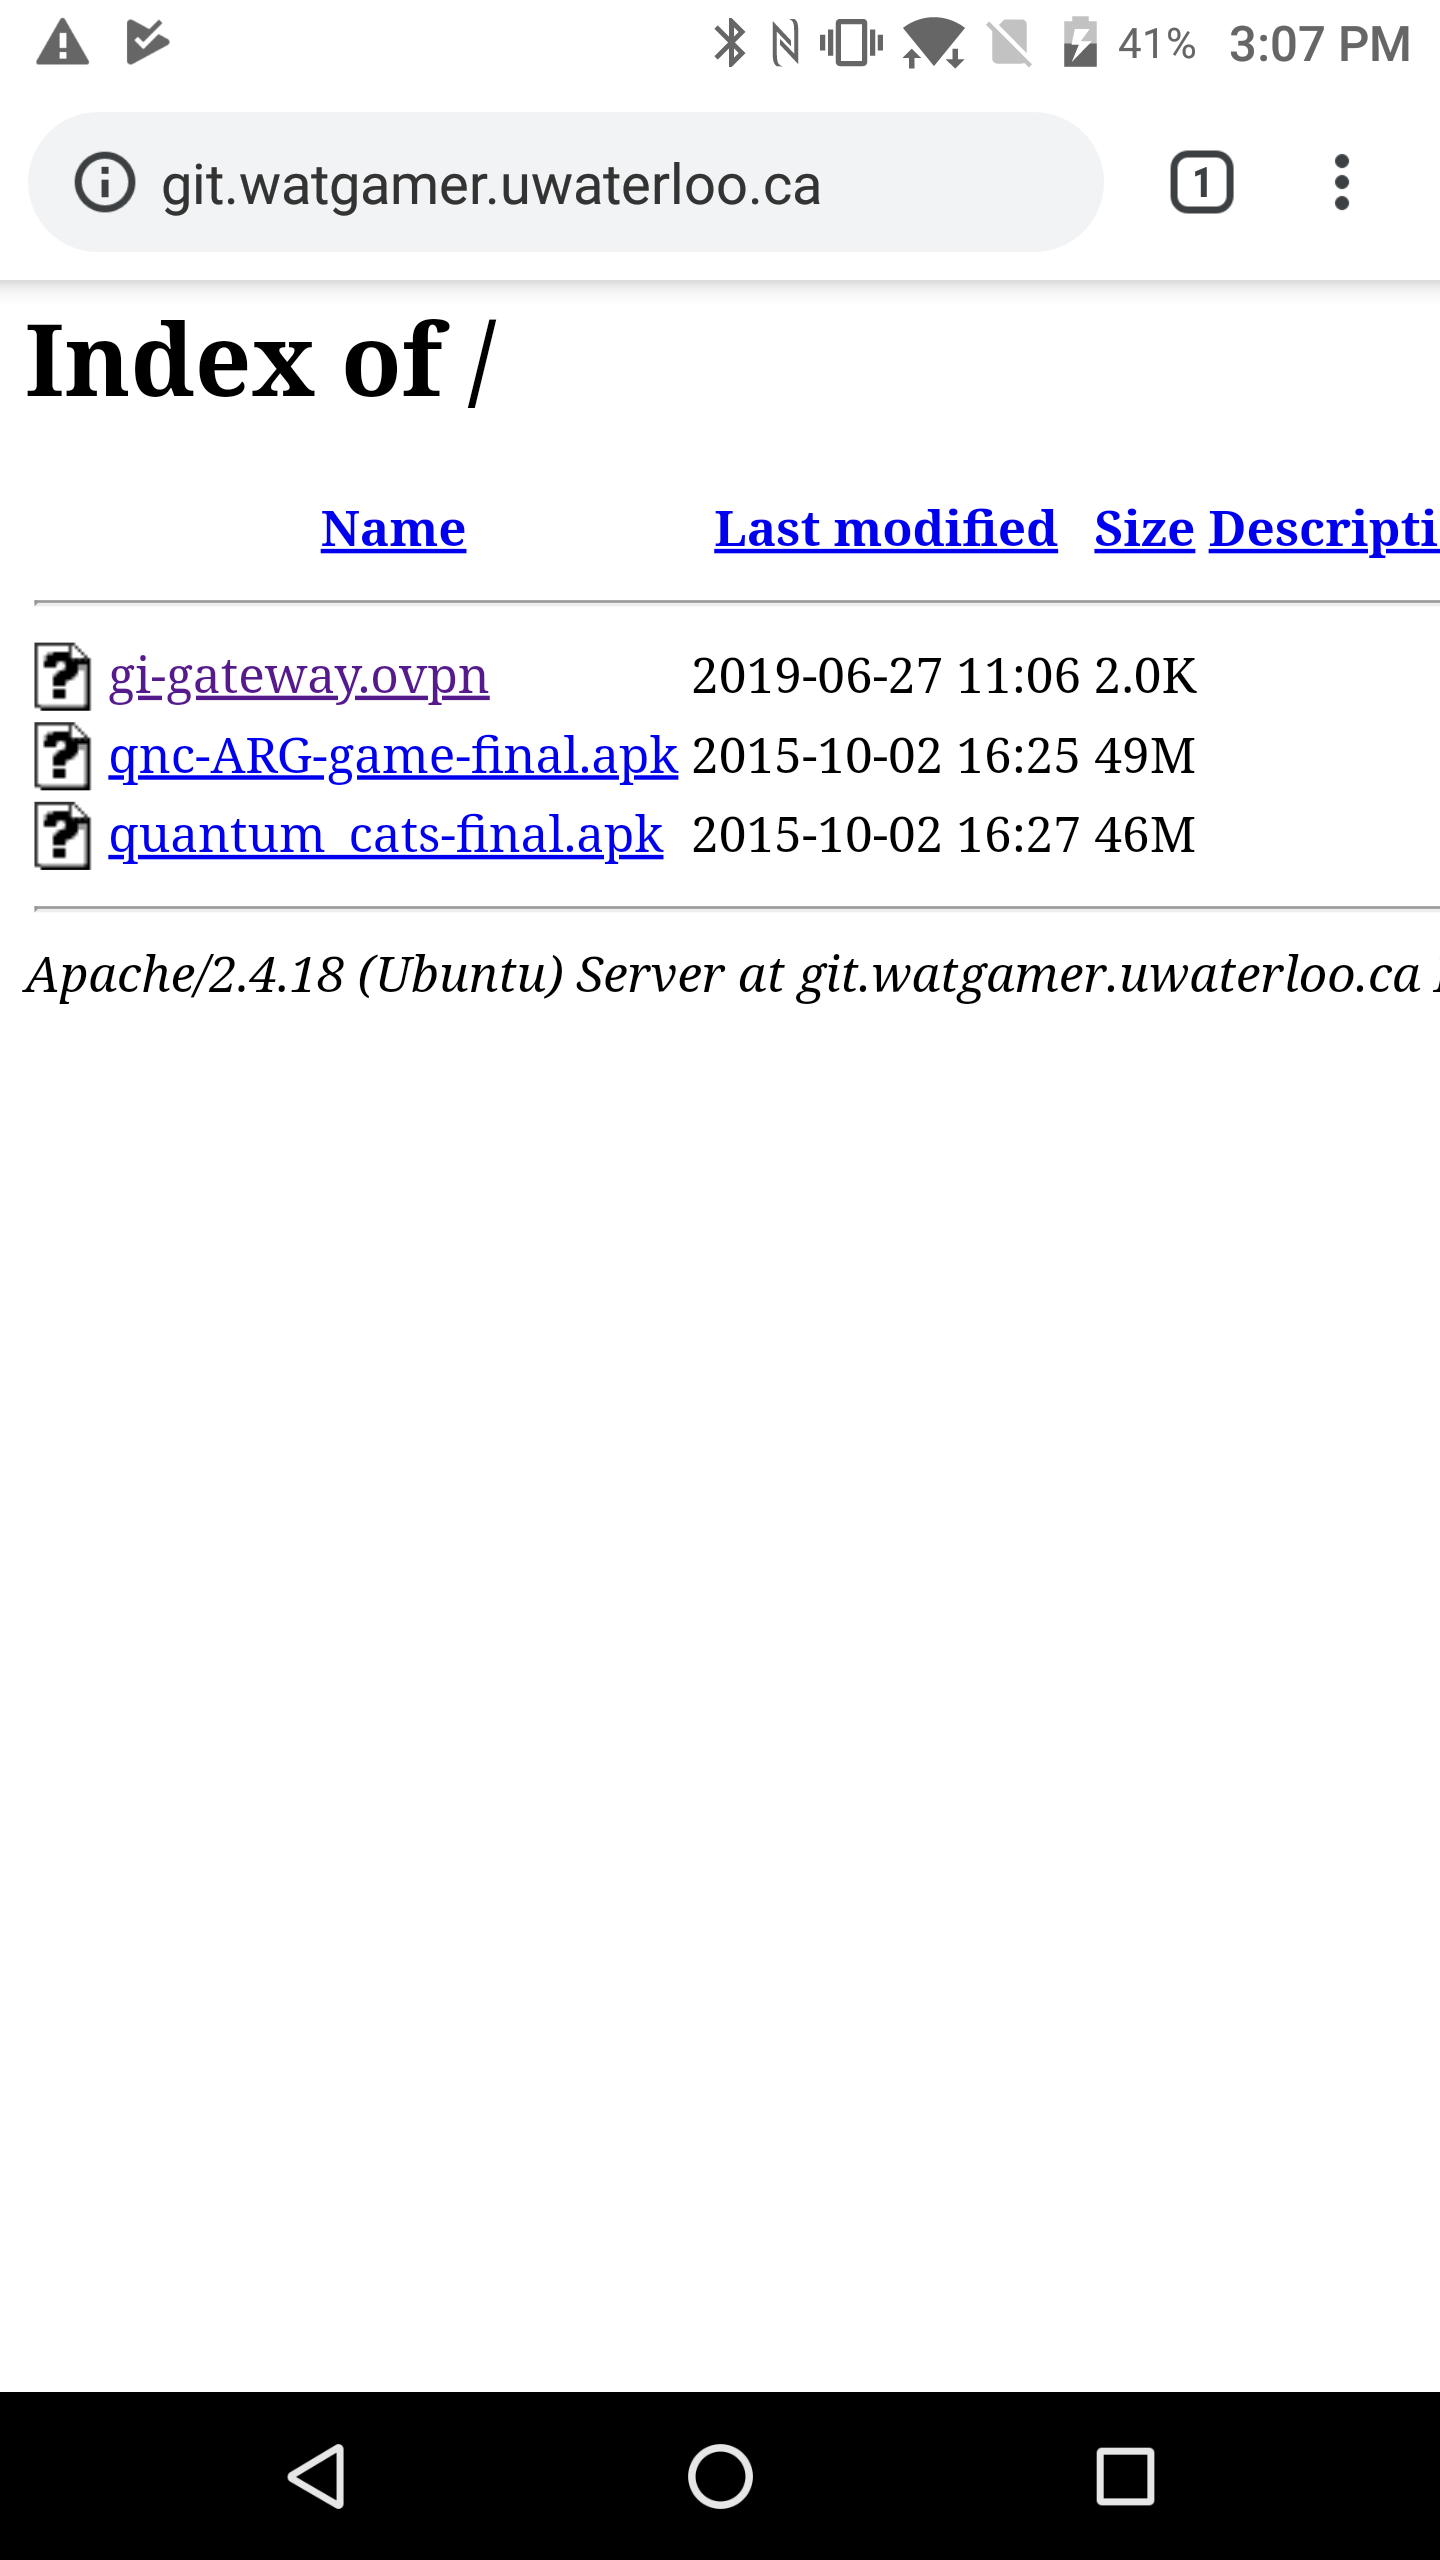
The configuration file for Games Institute OpenVPN clients can be downloaded here. The same file gives the default configuration for all supported clients. Contact the GI IT Support Team (gi-it@artsservices.uwaterloo.ca) for guidance with other configurations.
gi-gateway.ovpn
Top
Connecting with Windows
- First, download gi-gateway.ovpn . Save it to a place where you won't lose it.
- Next, download the OpenVPN GUI program.
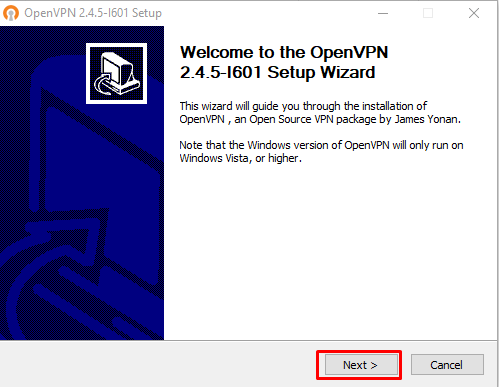
- Run the OpenVPN GUI installer. Windows will ask if you want to allow the installer to make changes. Click Yes. You should be greeted by the following window:
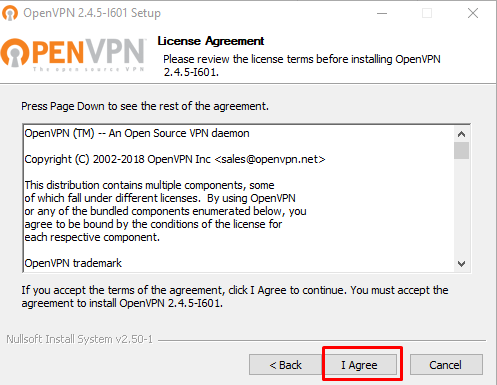
Click Next, and you will be greeted by the next screen, asking for you to accept the terms of agreement. Read through, then click I Agree.
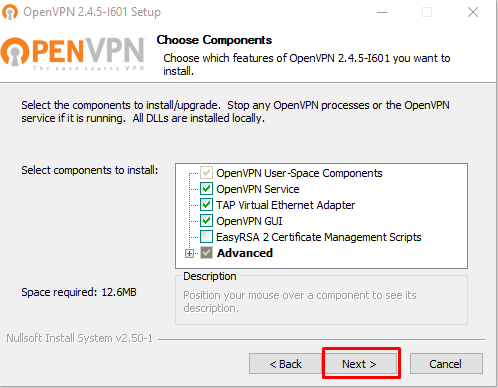
Click Next to install all of the default components:
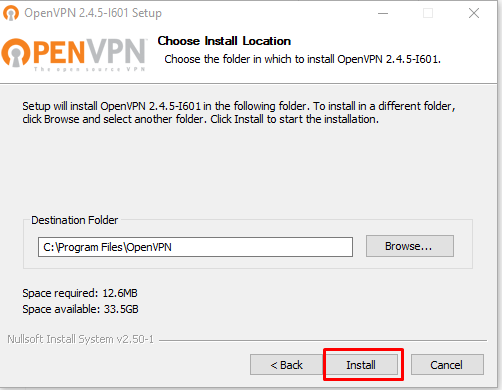
Choose where you want to install the program and click Install. It will now install the OpenVPN GUI application onto your computer.
During the installation, you will be prompted to install a device called TAP. Allow the installation by clicking Accept in the box that comes up.
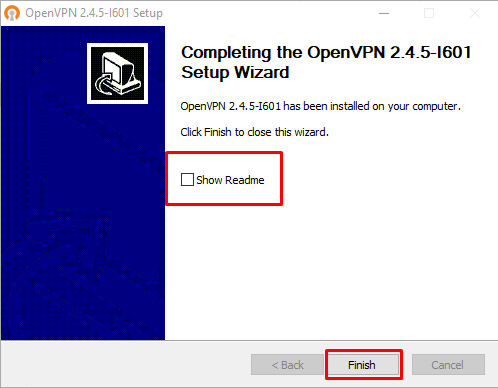
Once the installation is finished, uncheck the README box and click Finish
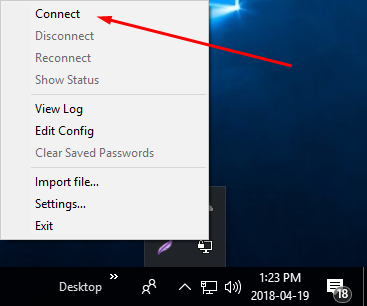
- Run the shortcut for OpenVPN GUI that was put onto your desktop. A window will appear. Press Ok to close it. Click the up arrow on the taskbar and right click the OpenVPN GUI icon, which looks like this:

When you right click you are greeted with a menu like the one below. Select the Import file... to import the .ovpn file that you downloaded at the beginning.

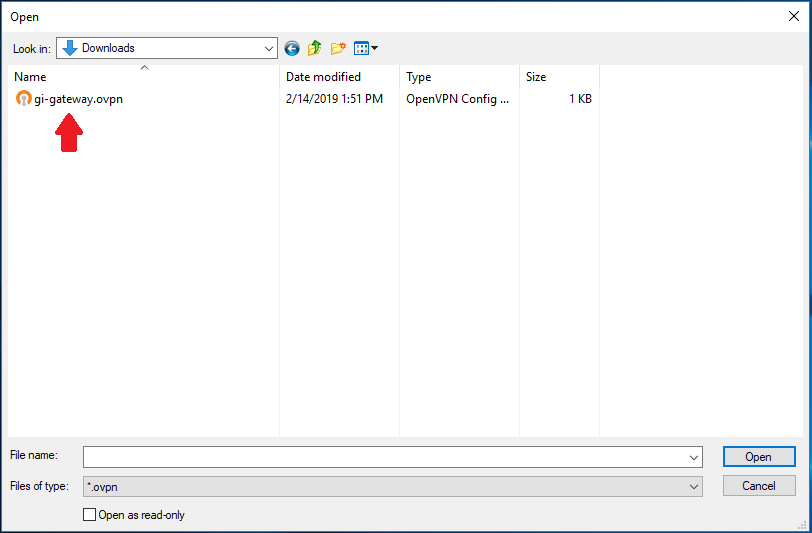
- Navigate to where you saved the .ovpn file. Select it and click Open to load it into OpenVPN.
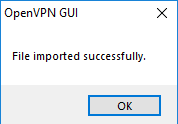
You will be prompted by a window like the one below that shows that the file was imported successfully.
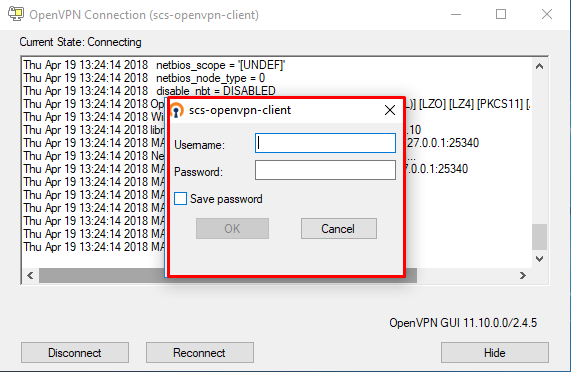
- Right click the OpenVPN icon in the taskbar again. You will notice that there are many more options to choose from. Select Connect to begin connecting to the VPN.
- The window that pops up is the OpenVPN GUI. Another, smaller window pops up, asking for your credentials to log in. Enter your WATGAMER credentials into their respective fields. Make sure to use your WATGAMER login, NOT WatIam/Nexus/Quest login!
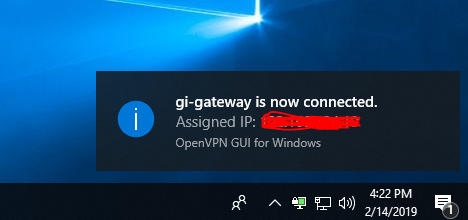
If you entered your credentials properly, the window will close and a Windows System notification will appear in the bottom right, saying that the vpn is now connected. It also shows the IP that you are assigned to by the VPN.
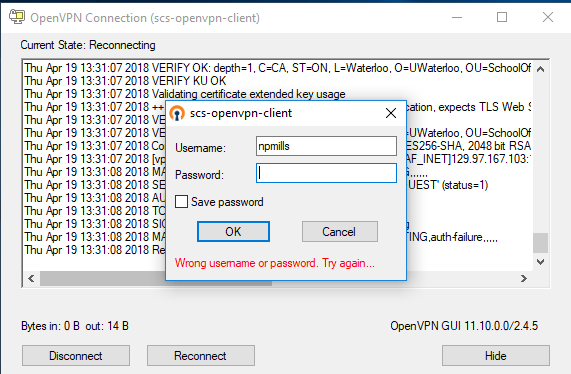
If you entered your credentials incorrectly, the credentials prompt will appear again, this time with red text at the bottom, like below:
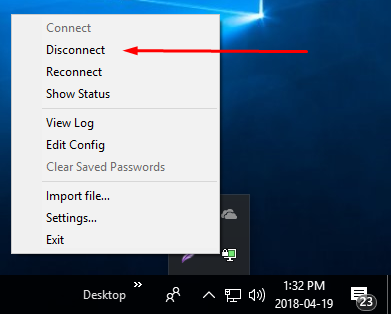
- In order to disconnect from the VPN, right click the OpenVPN icon in the taskbar and select Disconnect
Top
Connecting with Mac OS X
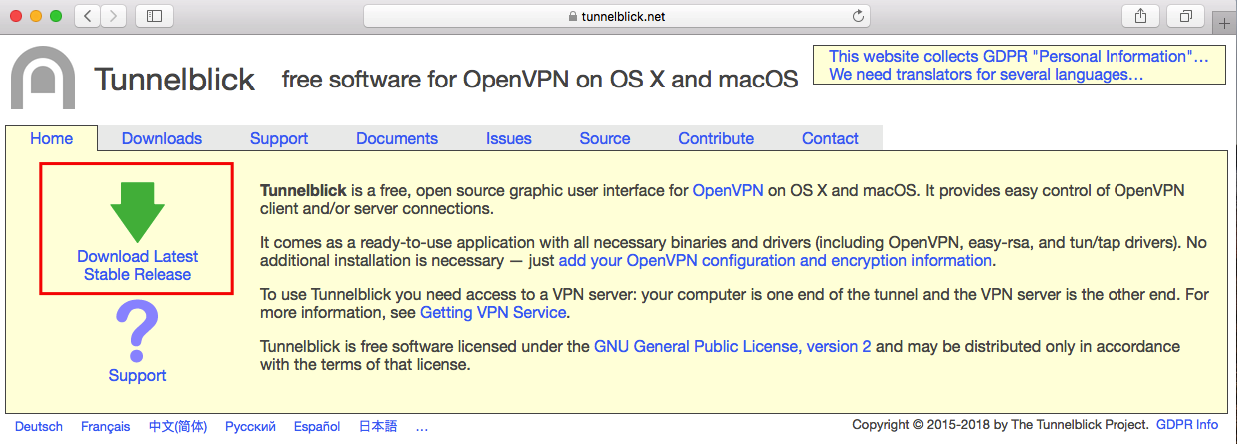
- First, download Tunnelblick
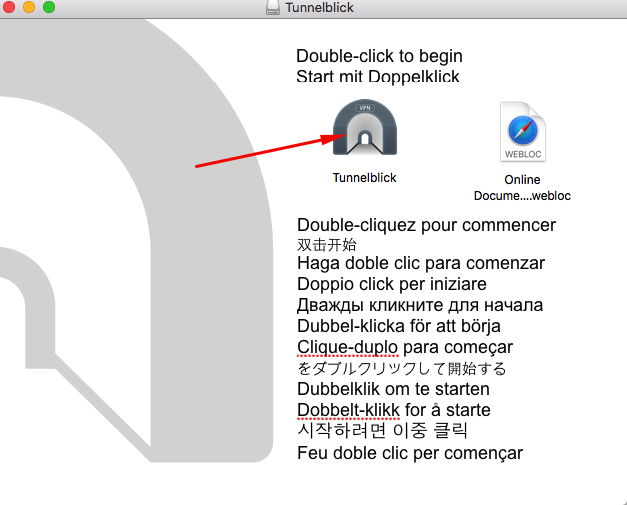
- Next, download gi-gateway.ovpn. Nagivate to where Tunneliblick downloaded and double click it. When Tunnelblick launches, you will be greeted with the following screen:
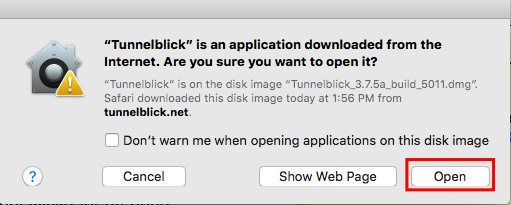
- The system will prompt you with a warning that "Tunnelblick" is an application downloaded from the internet. Click Open in the bottom right corner of the window.
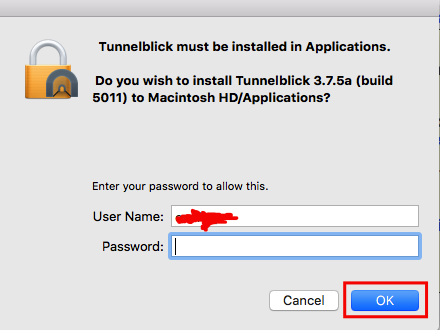
You will then be prompted for your password to allow Tunnelblick to be installed into Applications.
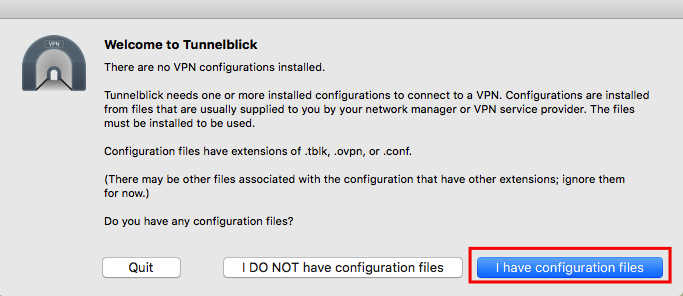
- Another window will appear, welcoming you to Tunnelblick and asking if you have any configuration files. In the bottom right corner, select I have configuration files
Yet another window will come up. Feel free to read through the text, and click Ok to continue.
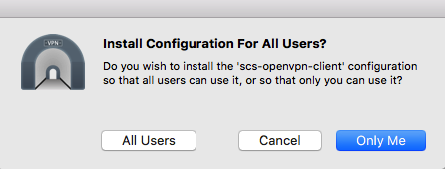
- Navigate to where you downloaded the .ovpn file. Select it, then drag it to the Tunnelblick icon in the top right corner of your screen.

A green circle with a white plus will appear and a window will pop up once the file is dropped asking if you want to install the configuration for all users or just yourself. Choose one to continue. You will be prompted for your password.
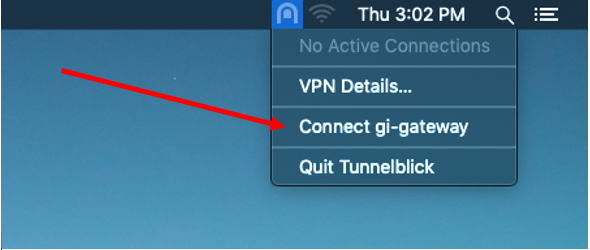
- Click on the Tunnelblick icon in the top right corner of the screen. A menu will drop down. Press the box named gi-gateway to start connecting to the VPN.
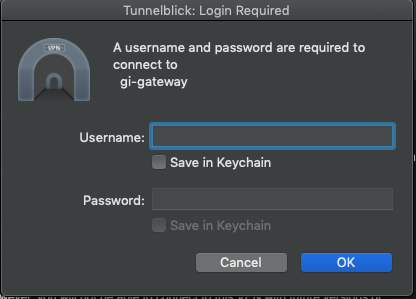
- You will then be prompted for your credentials to connect to the VPN. Enter your WATGAMER (NOT WatIam/Nexus/Quest) credentialss to start connecting.
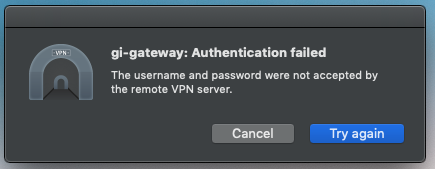
- If you are unable to successfully connect, you should see something like the following appear:
Top
Connecting with Ubuntu 16.04+
NOTE: Versions below 16.04 are NOT supported!
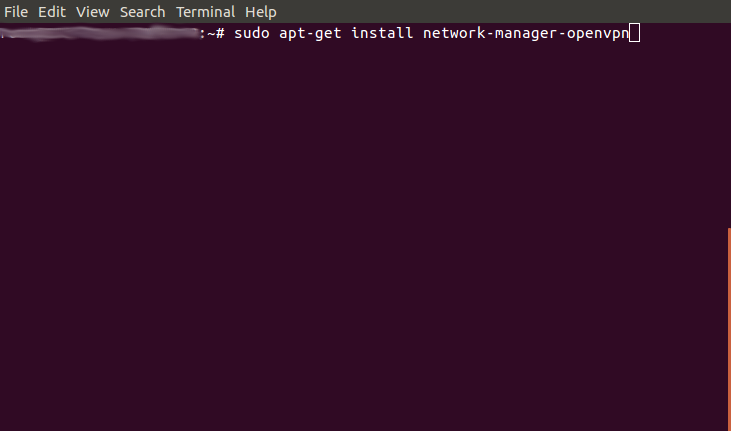
- First, open a terminal and enter the following command to install the Network Manager Plugin for OpenVPN.
Type the following into the terminal:
$ sudo apt-get install network-manager-openvpn
If that fails, then also install the following:
$ sudo apt-get install network-manager-openvpn-gnome
- Next, download VPN client configuration file gi-gateway.ovpn
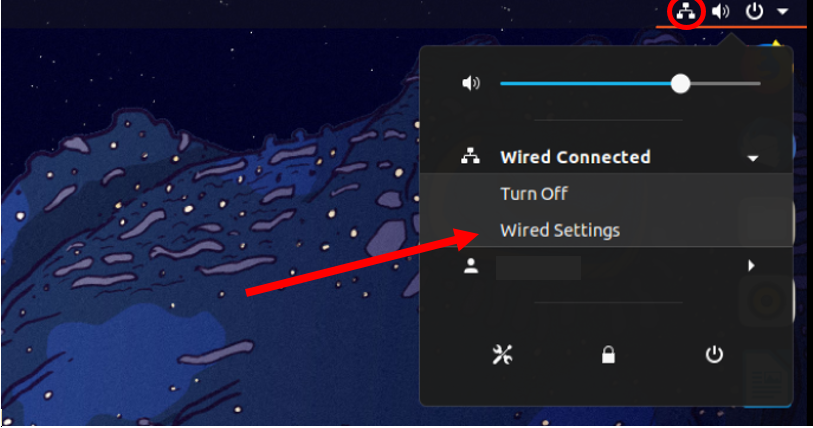
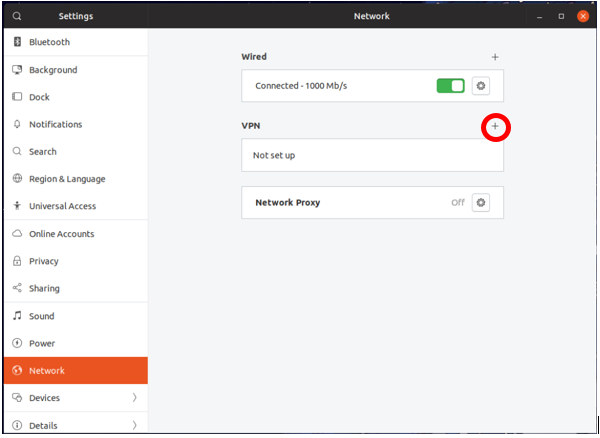
- Click the network manager icon in the top menu bar, expand wired connected and select "Wired Settings..."
- In the Network Connections box, click "+".
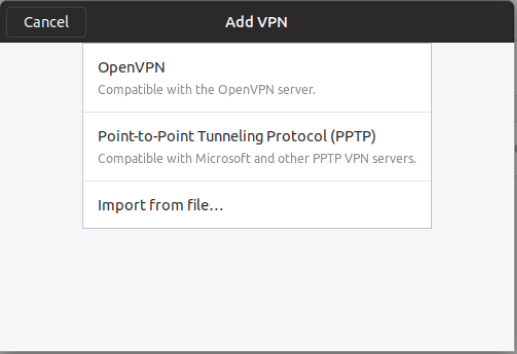
- Select "Import From File...".
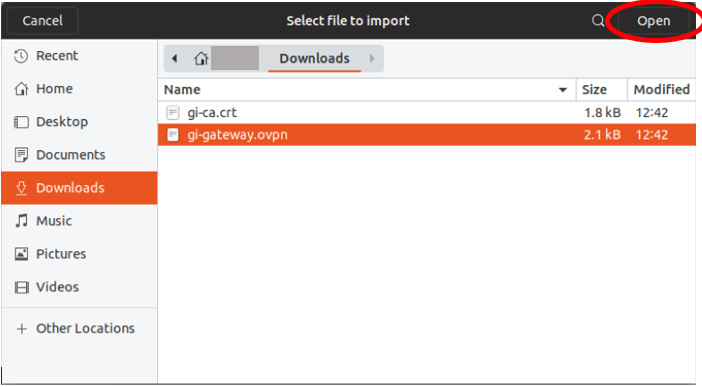
- Next, browse to where you downloaded the .ovpn file earlier (should be named gi-gateway.opvn). Select it and click "Open".
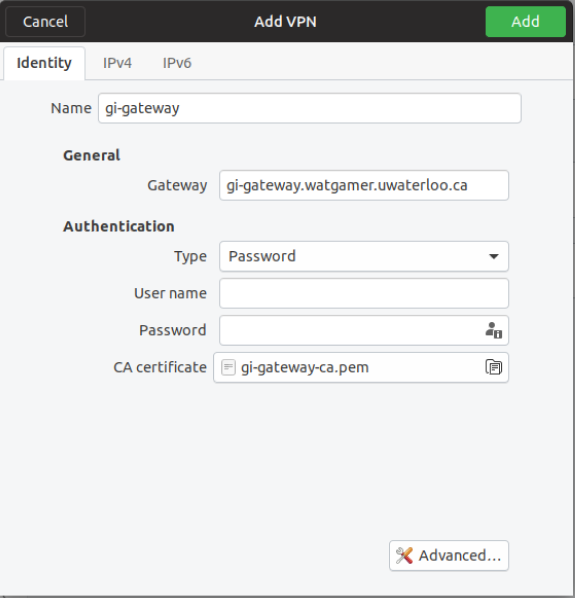
- Make sure that the dropdown box "Type" is set to "Password". Enter your WATGAMER credentials into their respective fields. The "CA Certificate" should be automatically filled with the client CA Certificate that is present in the .ovpn file. It will show asgi-gateway-ca.pem). This is your client certificate that lets you connect to the VPN. Once everything is filled in, click "Add". Then, in the "Network Connections" box, click "Close". NOTE: If the Add button is grayed out, please follow the instructions in Step 9.
- Go back to the network manager icon in the top menu bar. Hover over "VPN Connections" and click toggle switch on the newly created VPN Connection. A box will appear in the top right of your screen indicating whether or not you were able to successfully connect to the VPN.
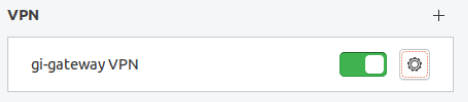
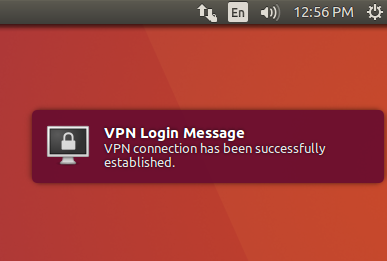
If you were able to connect, you should see something similar to this:
If you were unable to connect, you should see something similar to this:
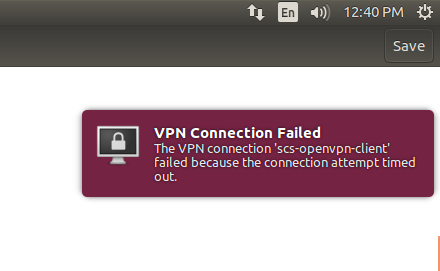
If you see this, double-check that you entered your credentials properly. Remember, you use your WatGamer creds, not WatIam/Nexus/Quest credentials!
- On certain systems (such as Arch Linux), the 'Save' button is grayed out and there are extra configuration options, such as "CA private key". Please note that the Network Manager applet doesn't support embedded certs in the .ovpn config file. So extract all
BEGIN... and keys to dedicated .crt files, which you can link using ca /path/to/ca.crt and cert /path/to/id.crt etc . manually extract the... part and point "CA private key" to the temporary file. In this case the temoorary file needs to be available whenever anything is changed.
Top
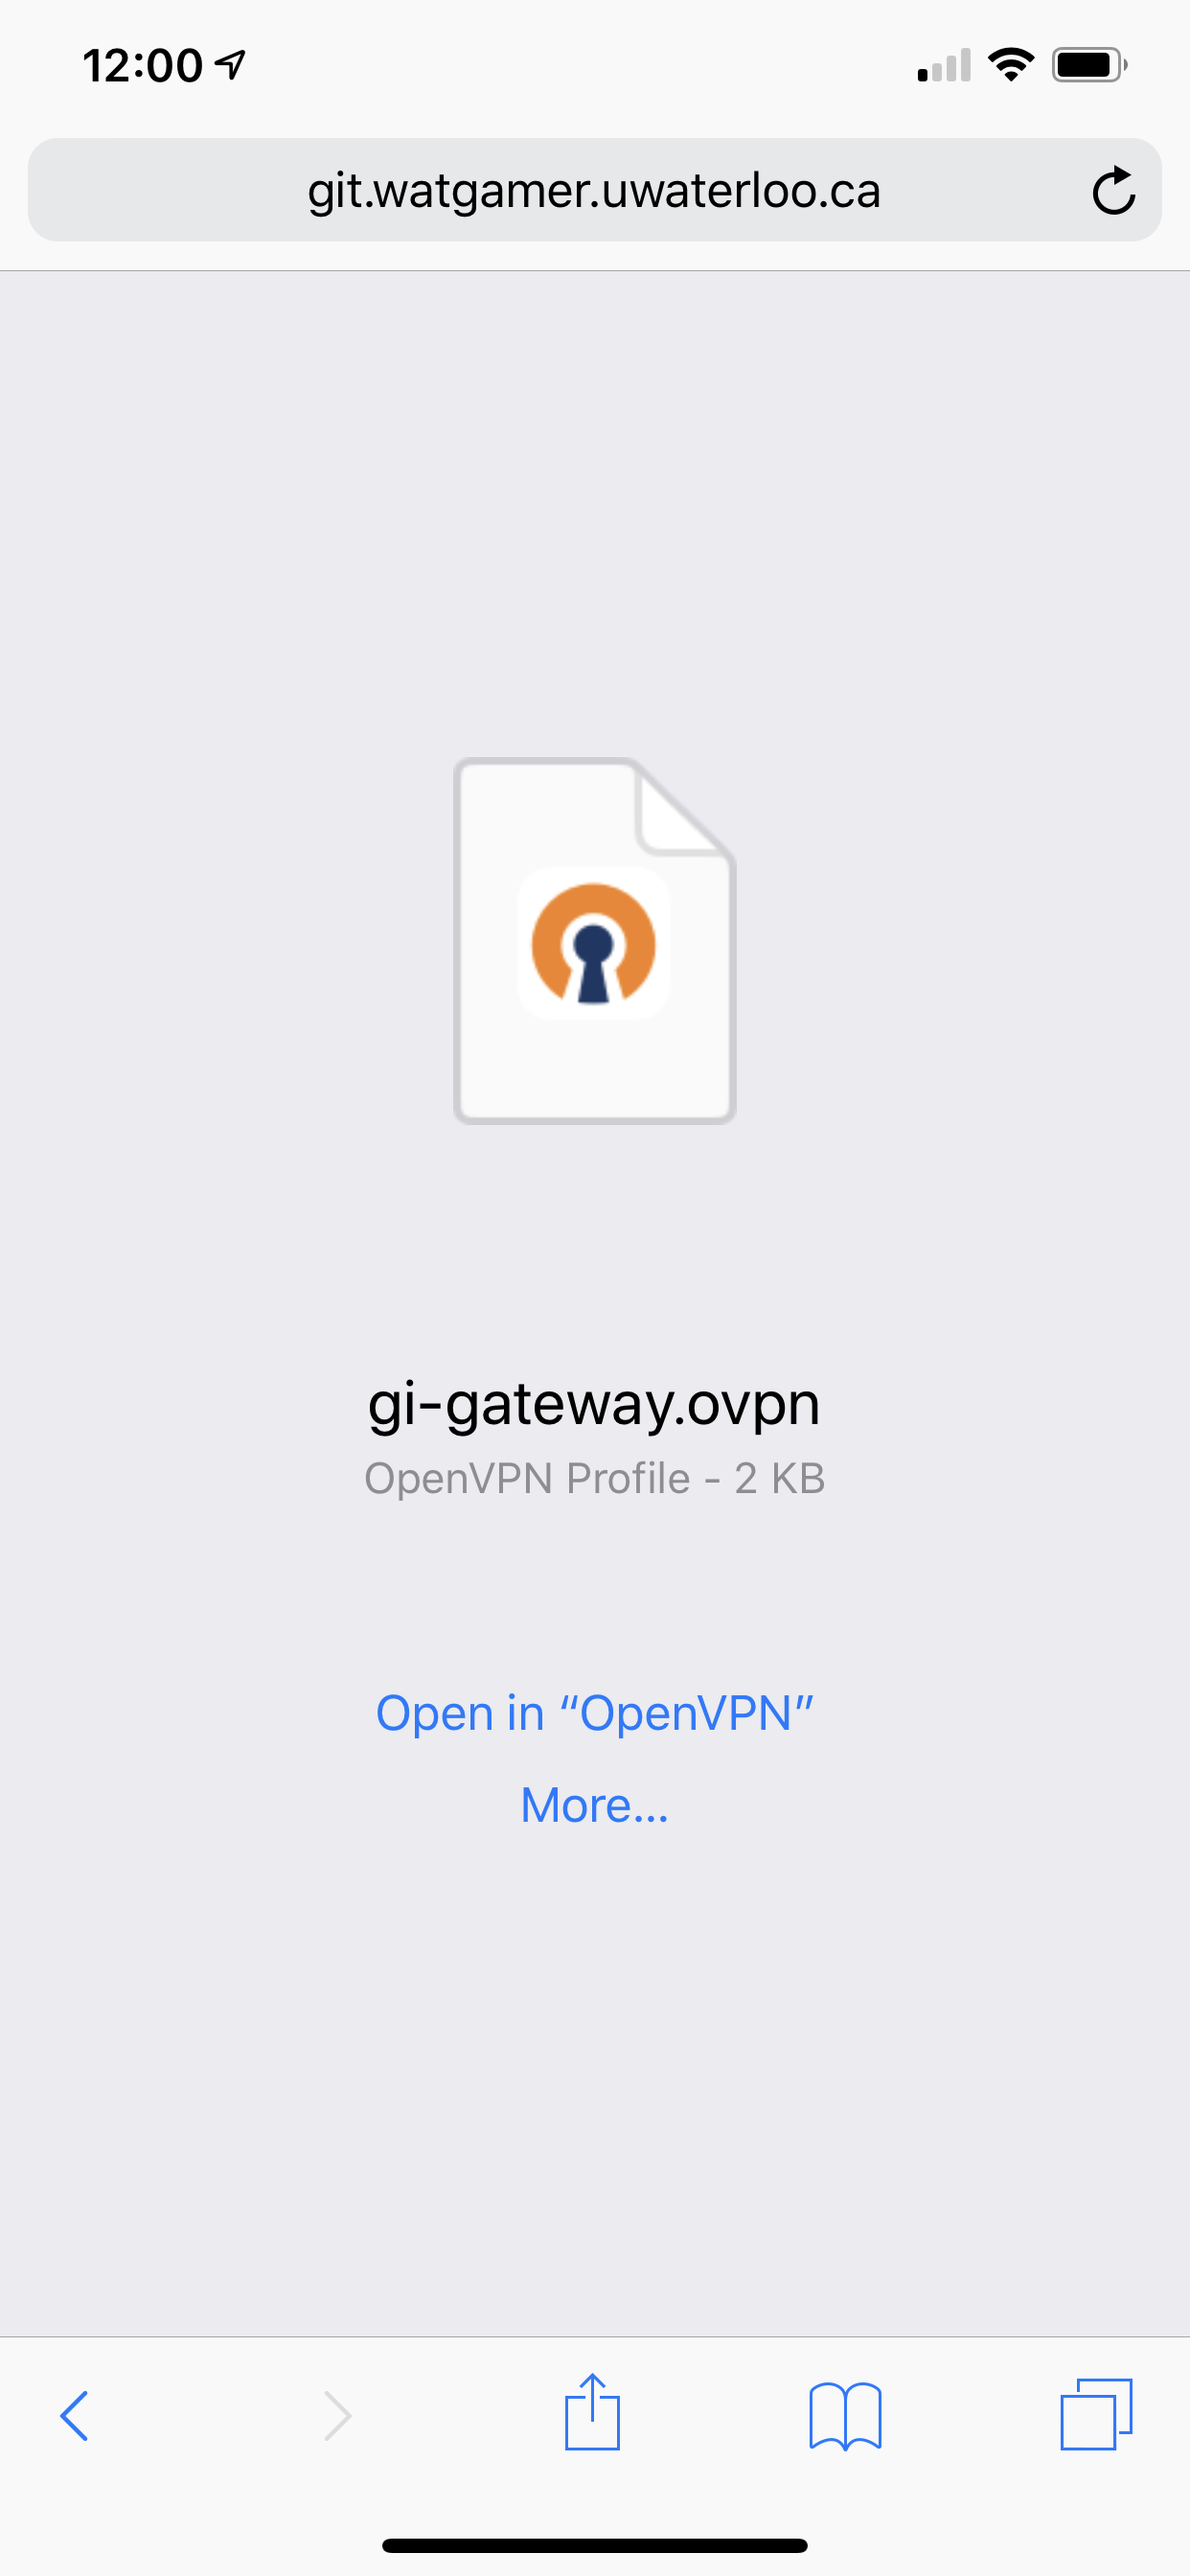
Connecting with iOS
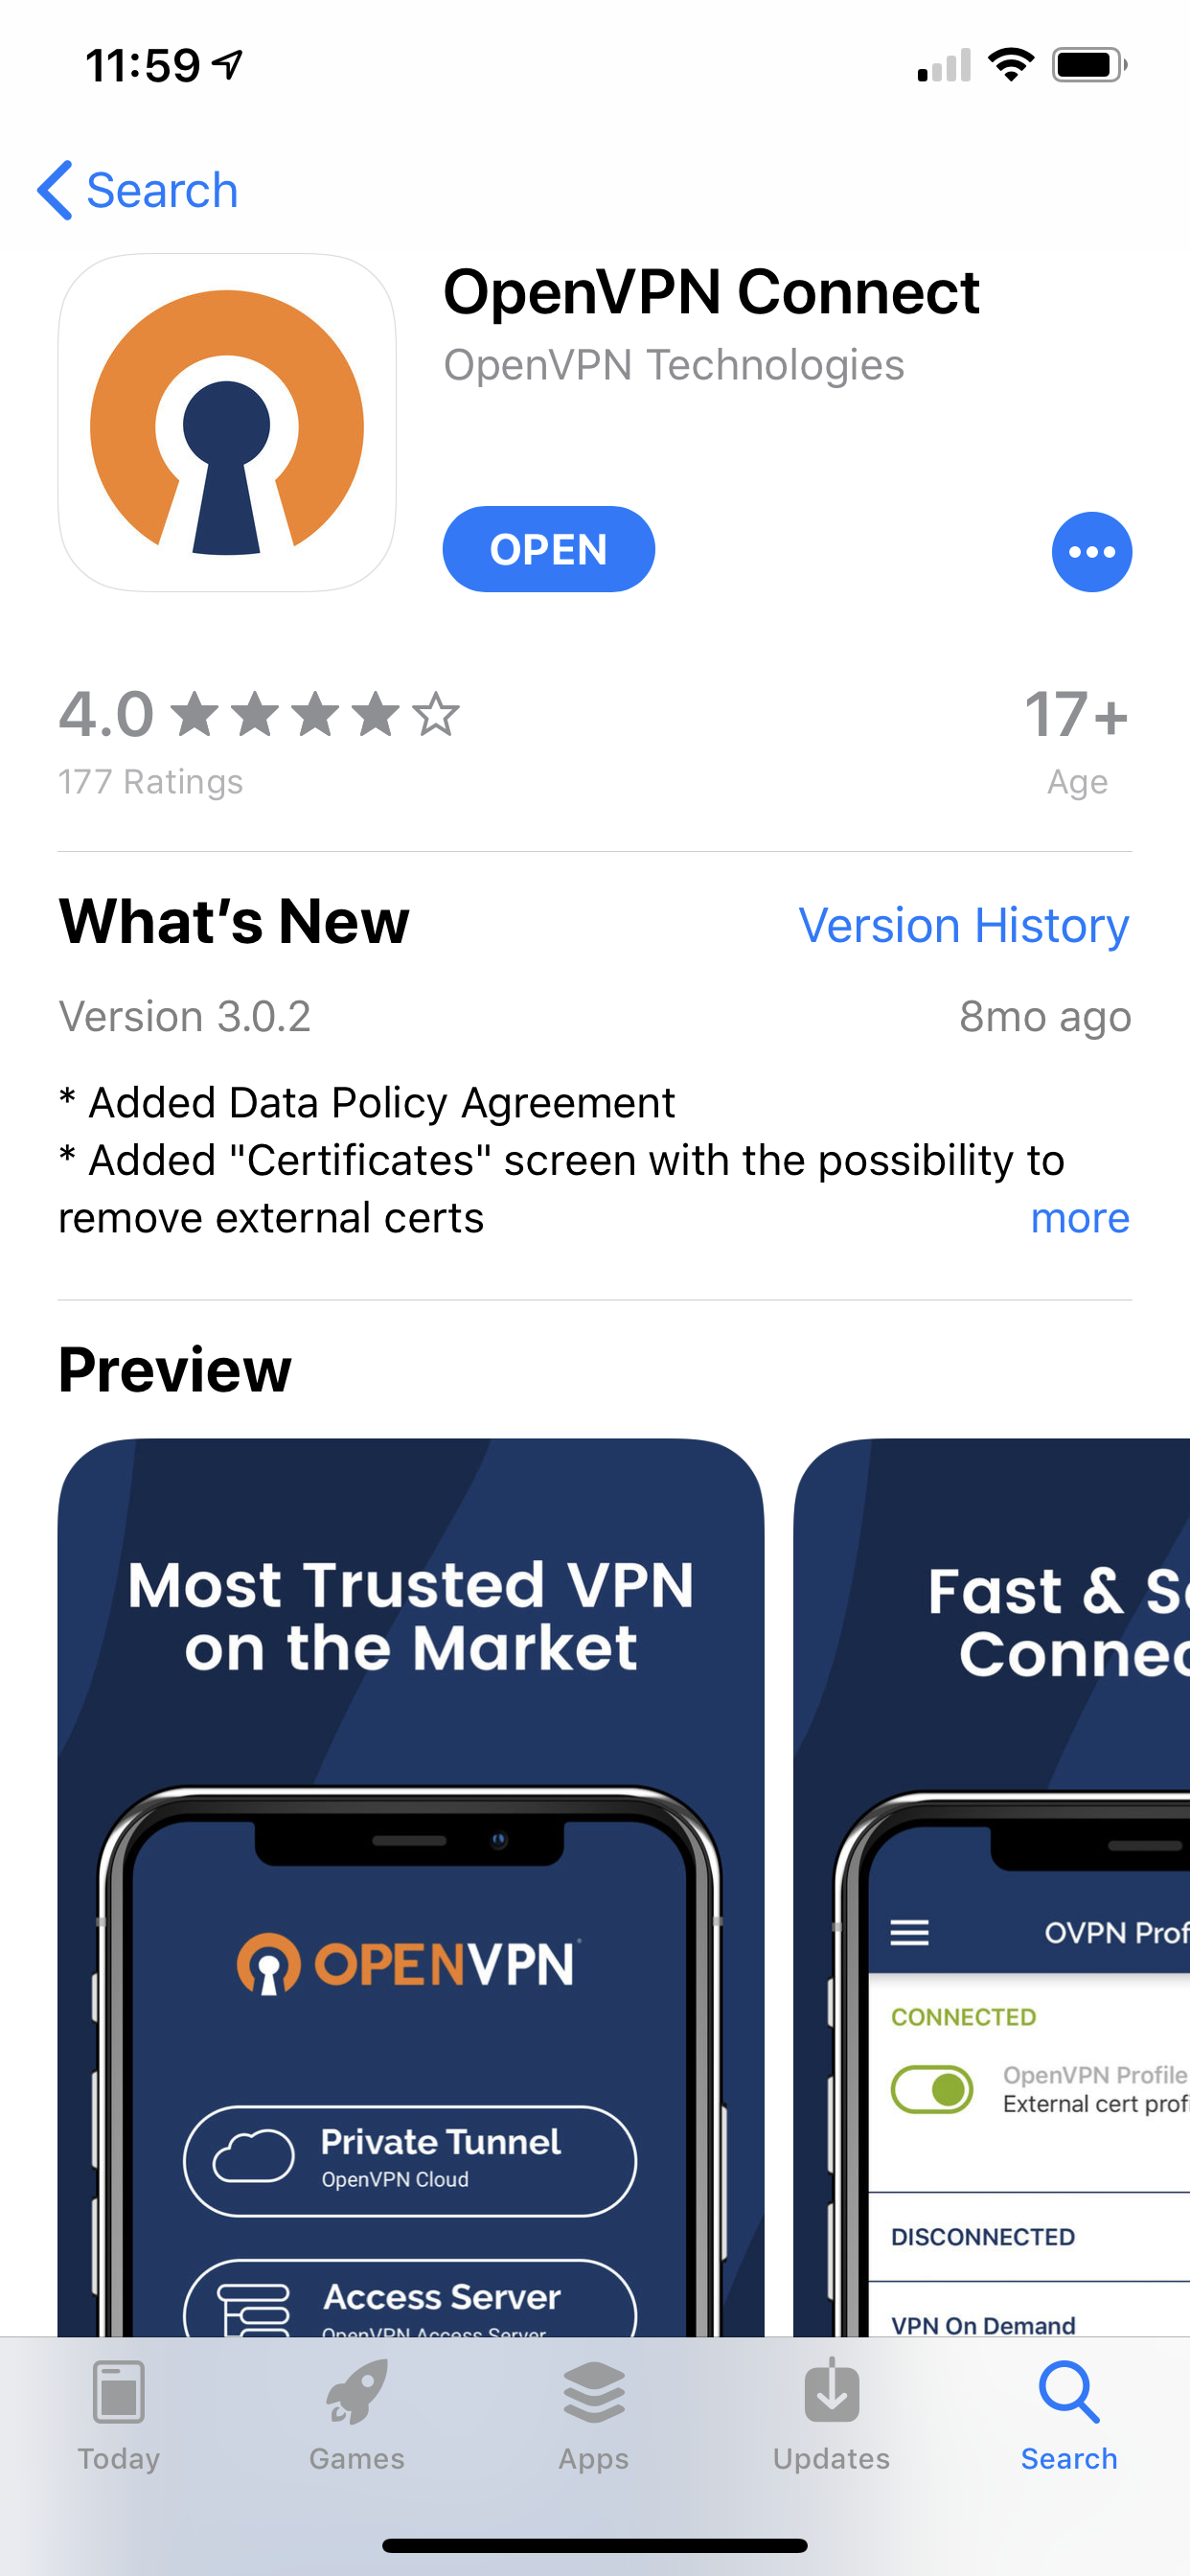
- First, download the OpenVPN Connect app from here.
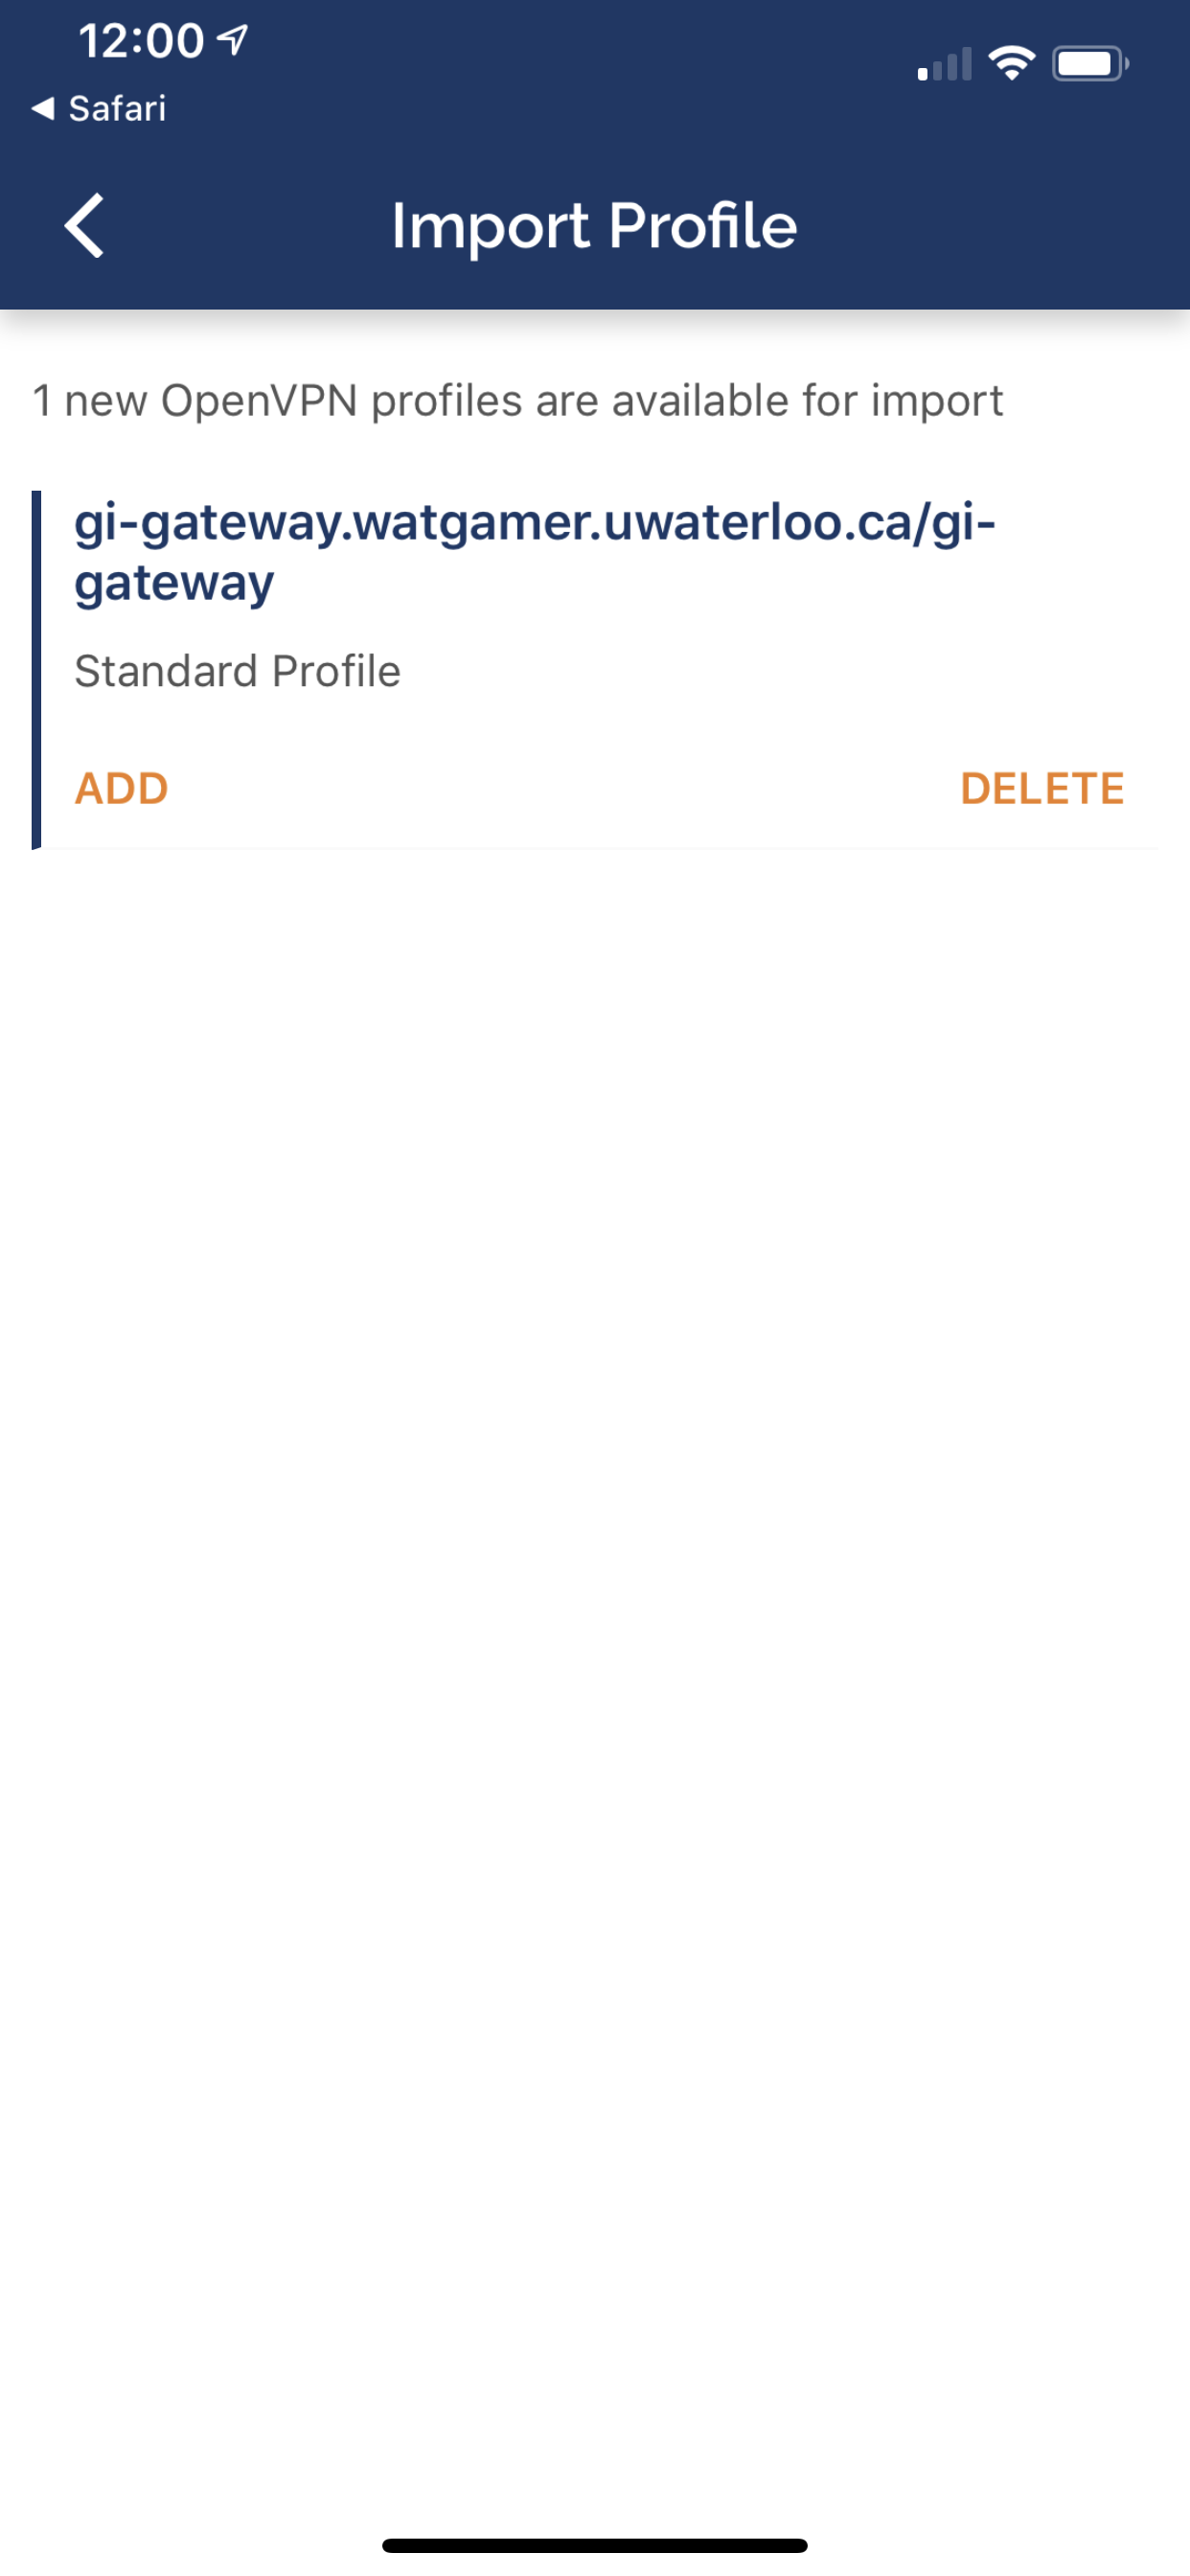
- Select the VPN client configuration file gi-gateway.ovpn. Press "Open in OpenVPN". This will open the VPN configuration in the OpenVPN Connect app that you installed earlier.
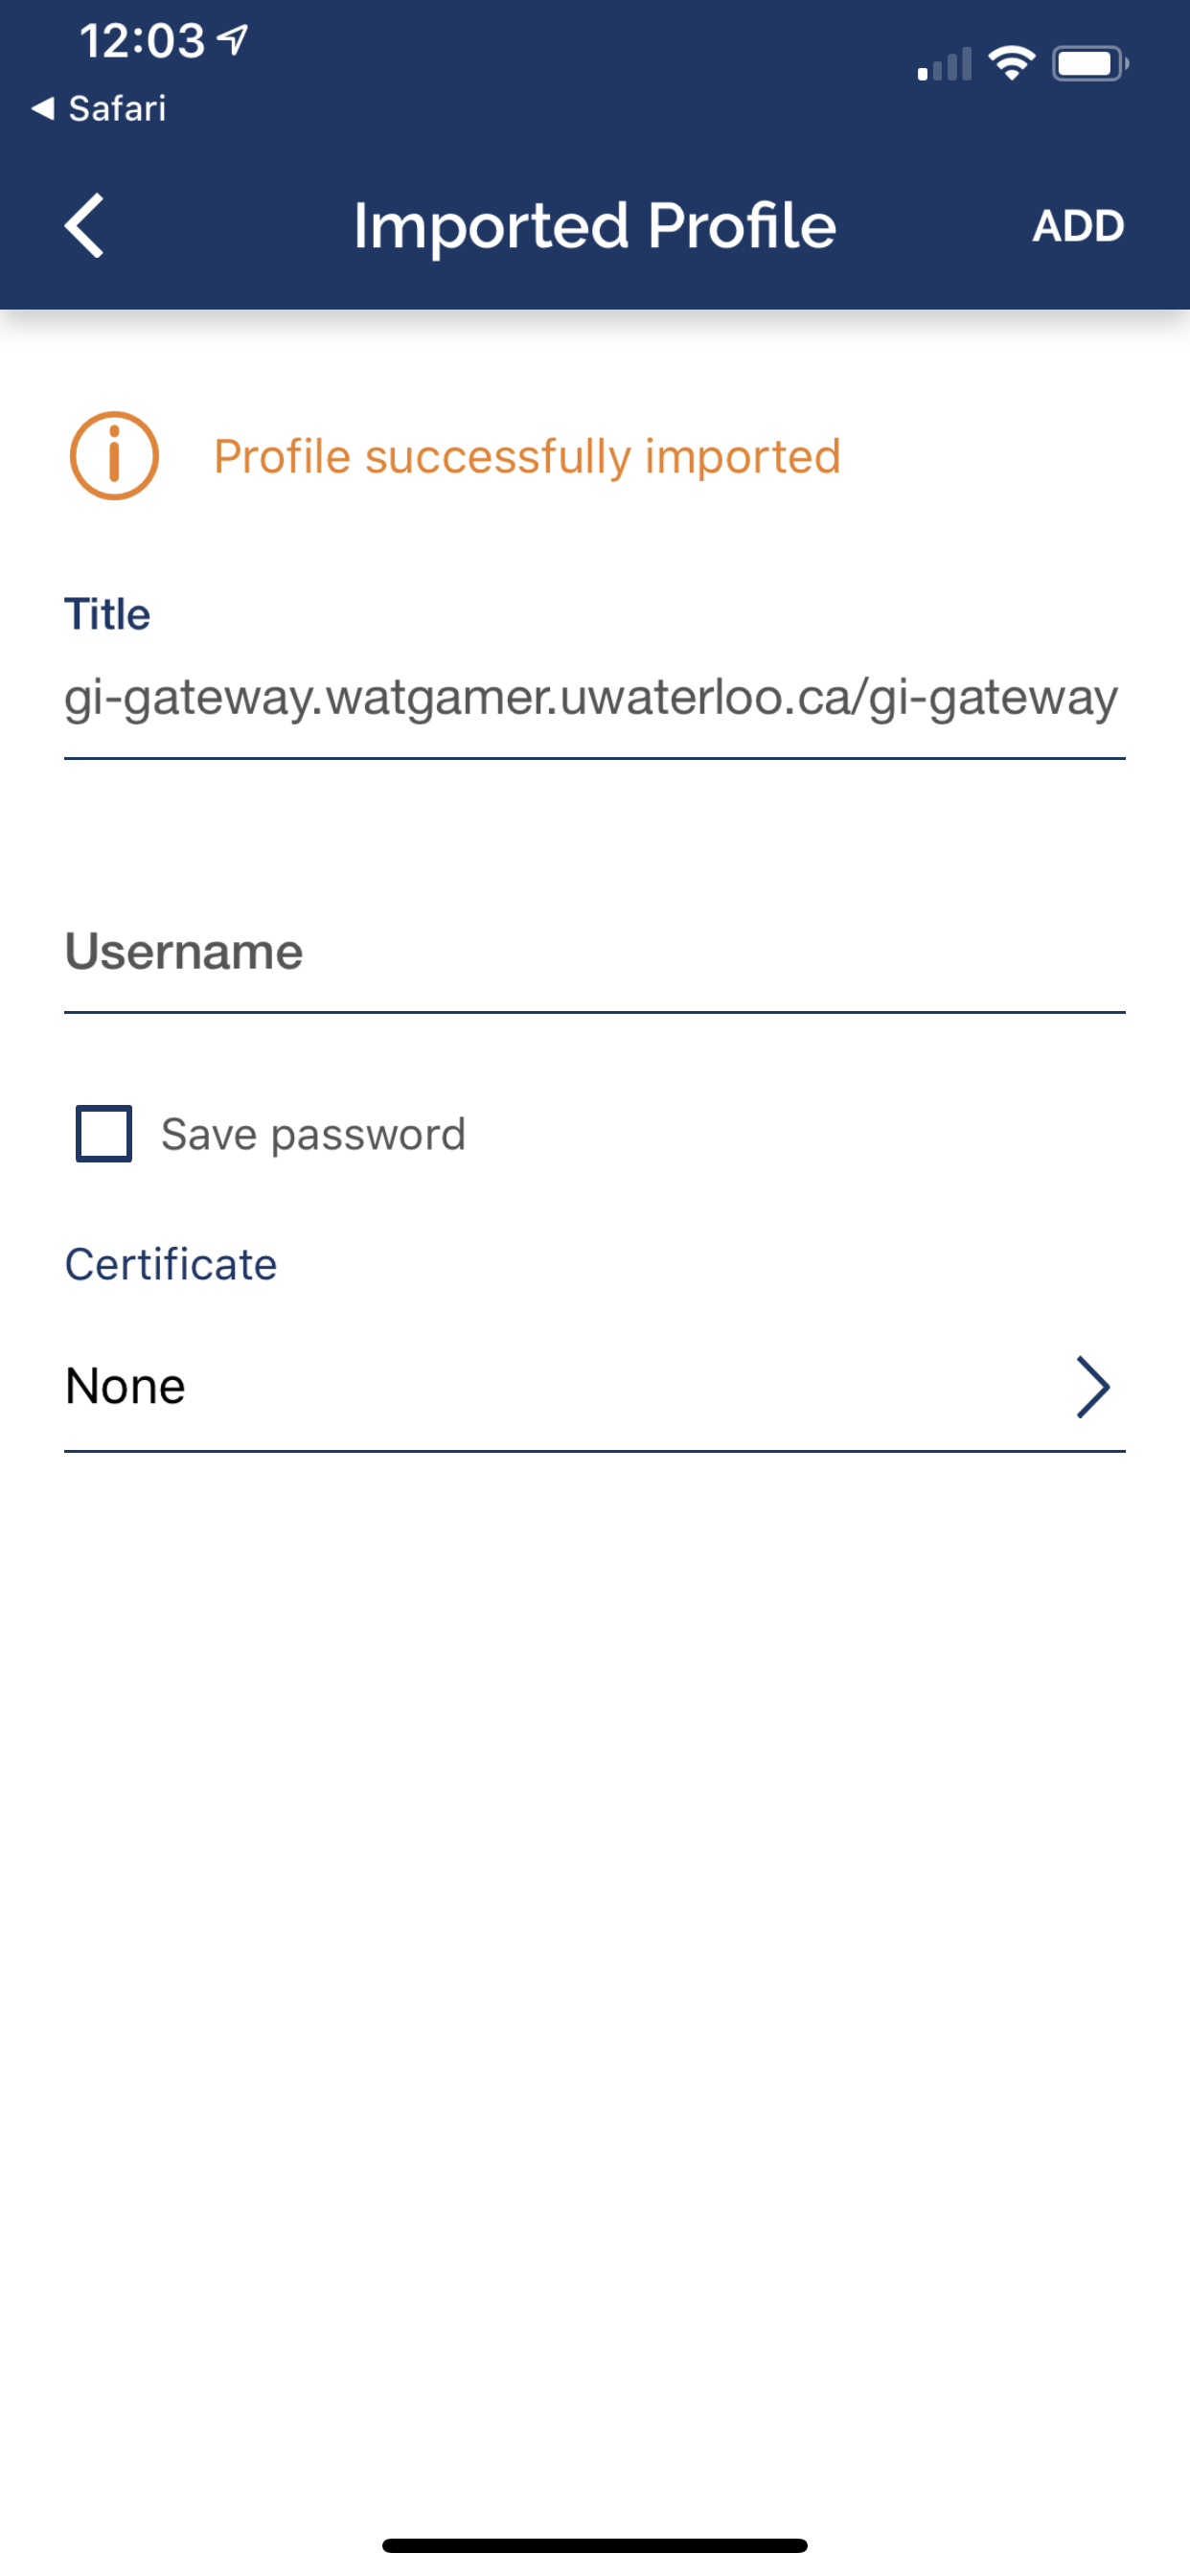
- Press the Add button to add the configuration.
- Enter your WatGamer (NOT WatIam/Nexus/Quest) credentials into their respective fields. The Save password switch is turned off by default - turn it on if you do want OpenVPN Connect to save your credentials. Click Add to save the profile.
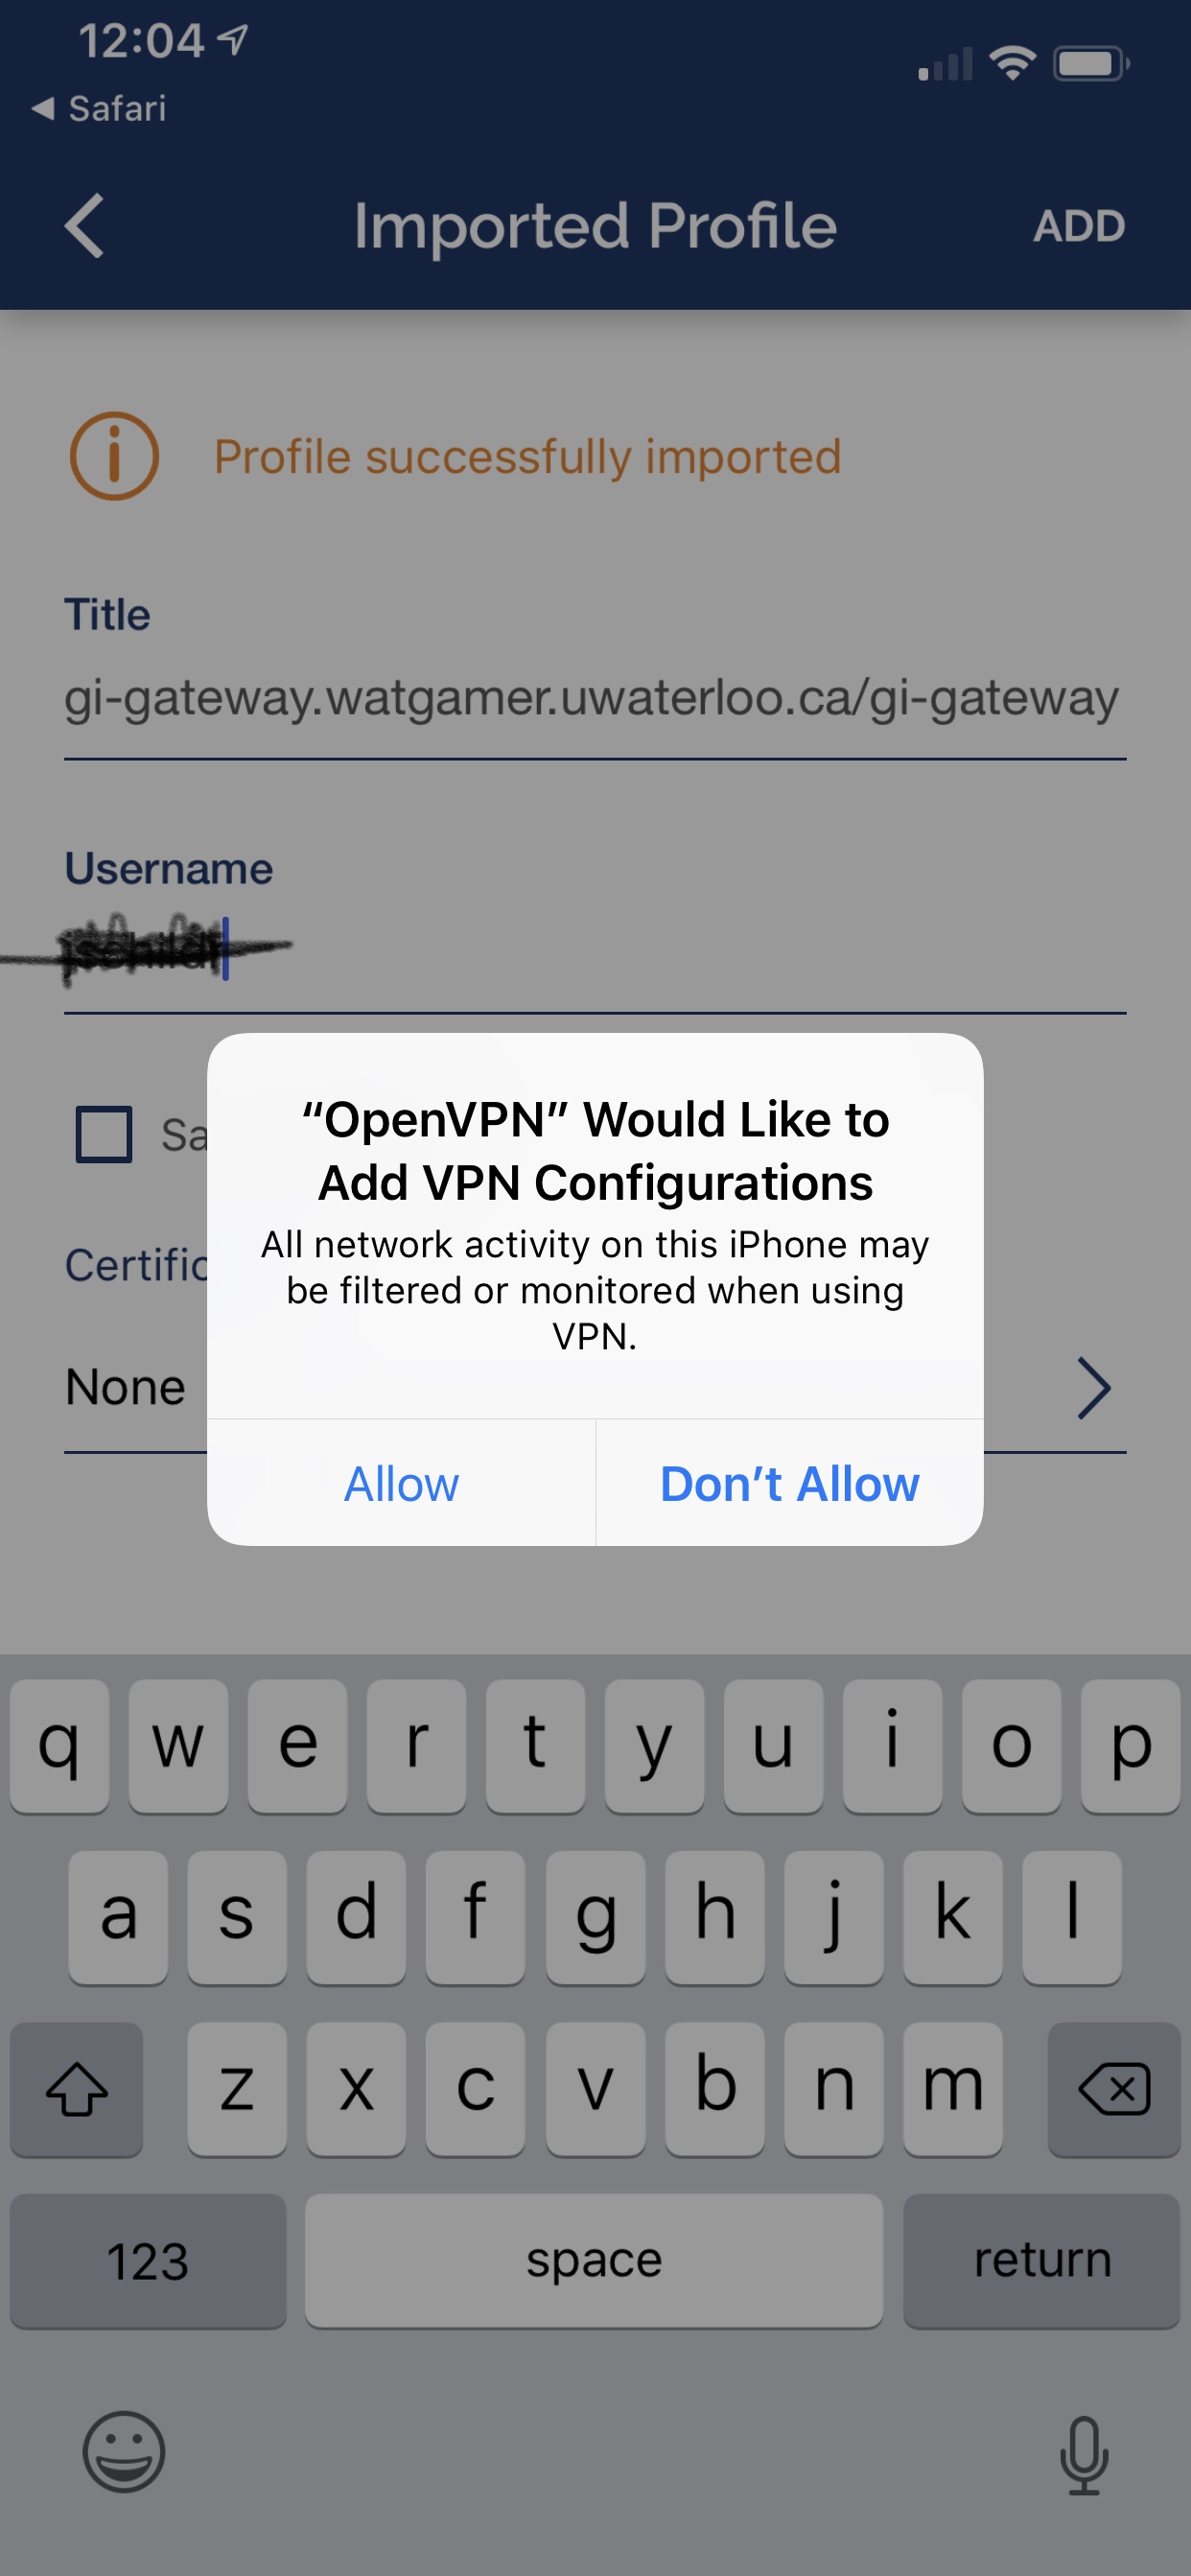
- Press Allow on the system prompt to allow OpenVPN Connect to add a new VPN Configuration - the one that allows you to connect to gi-gateway.watgamer.uwaterloo.ca. You will need to either use FaceID, TouchID or your password to allow OpenVPN to create the VPN Configuration.
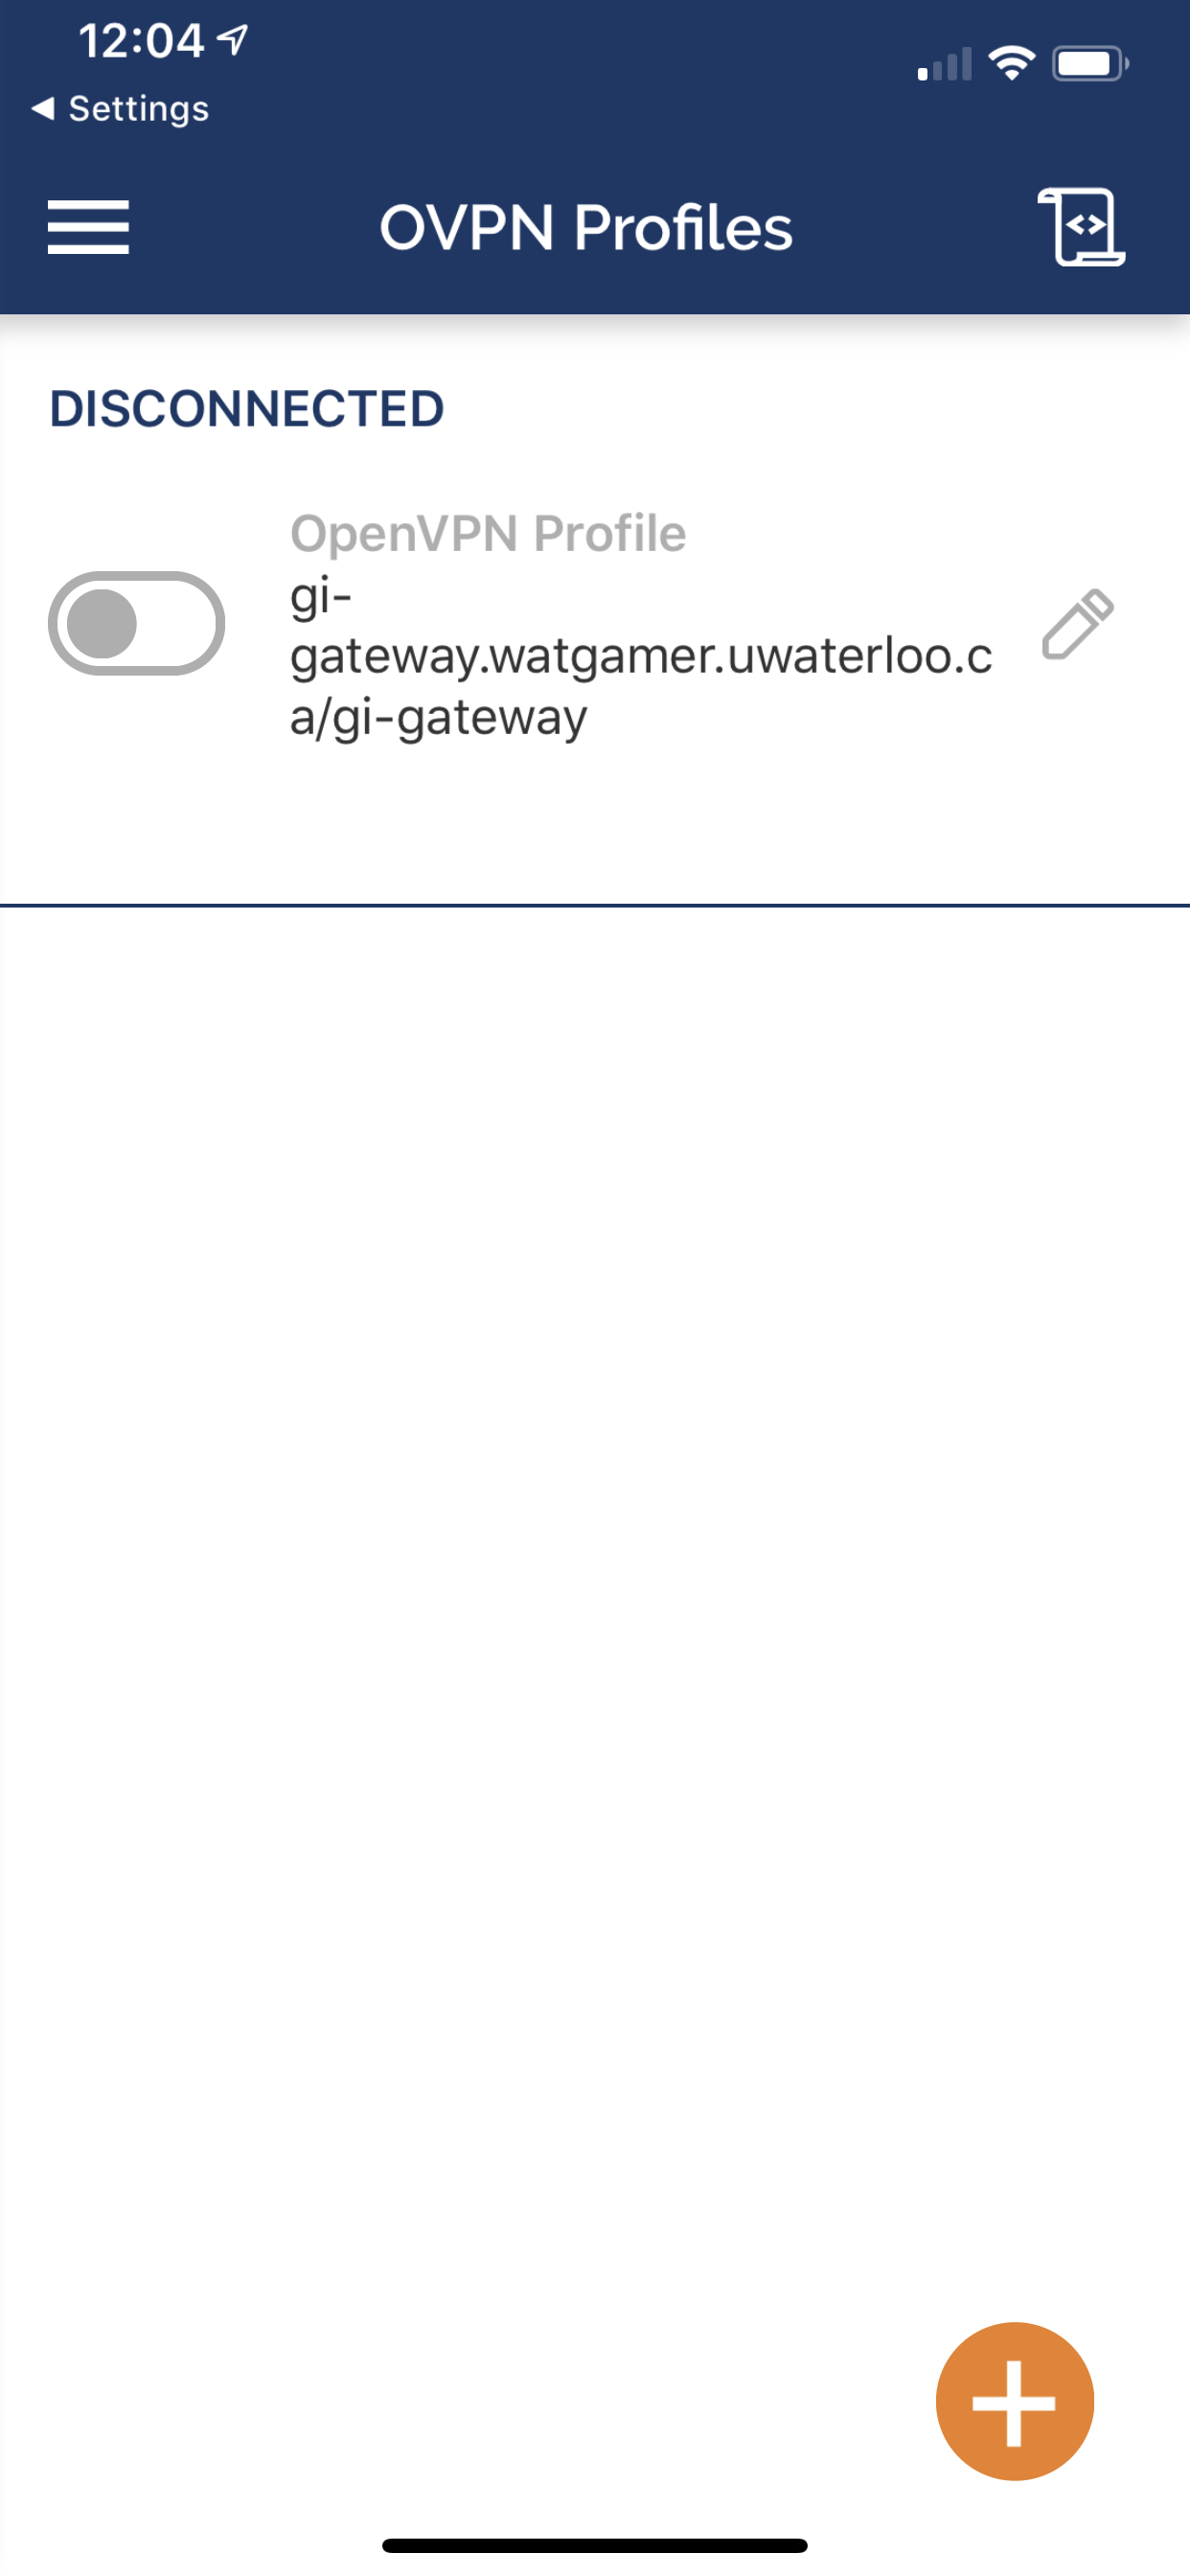
- If adding the profile was successful, you should see the GI-Gateway disconnected profile similar to this:
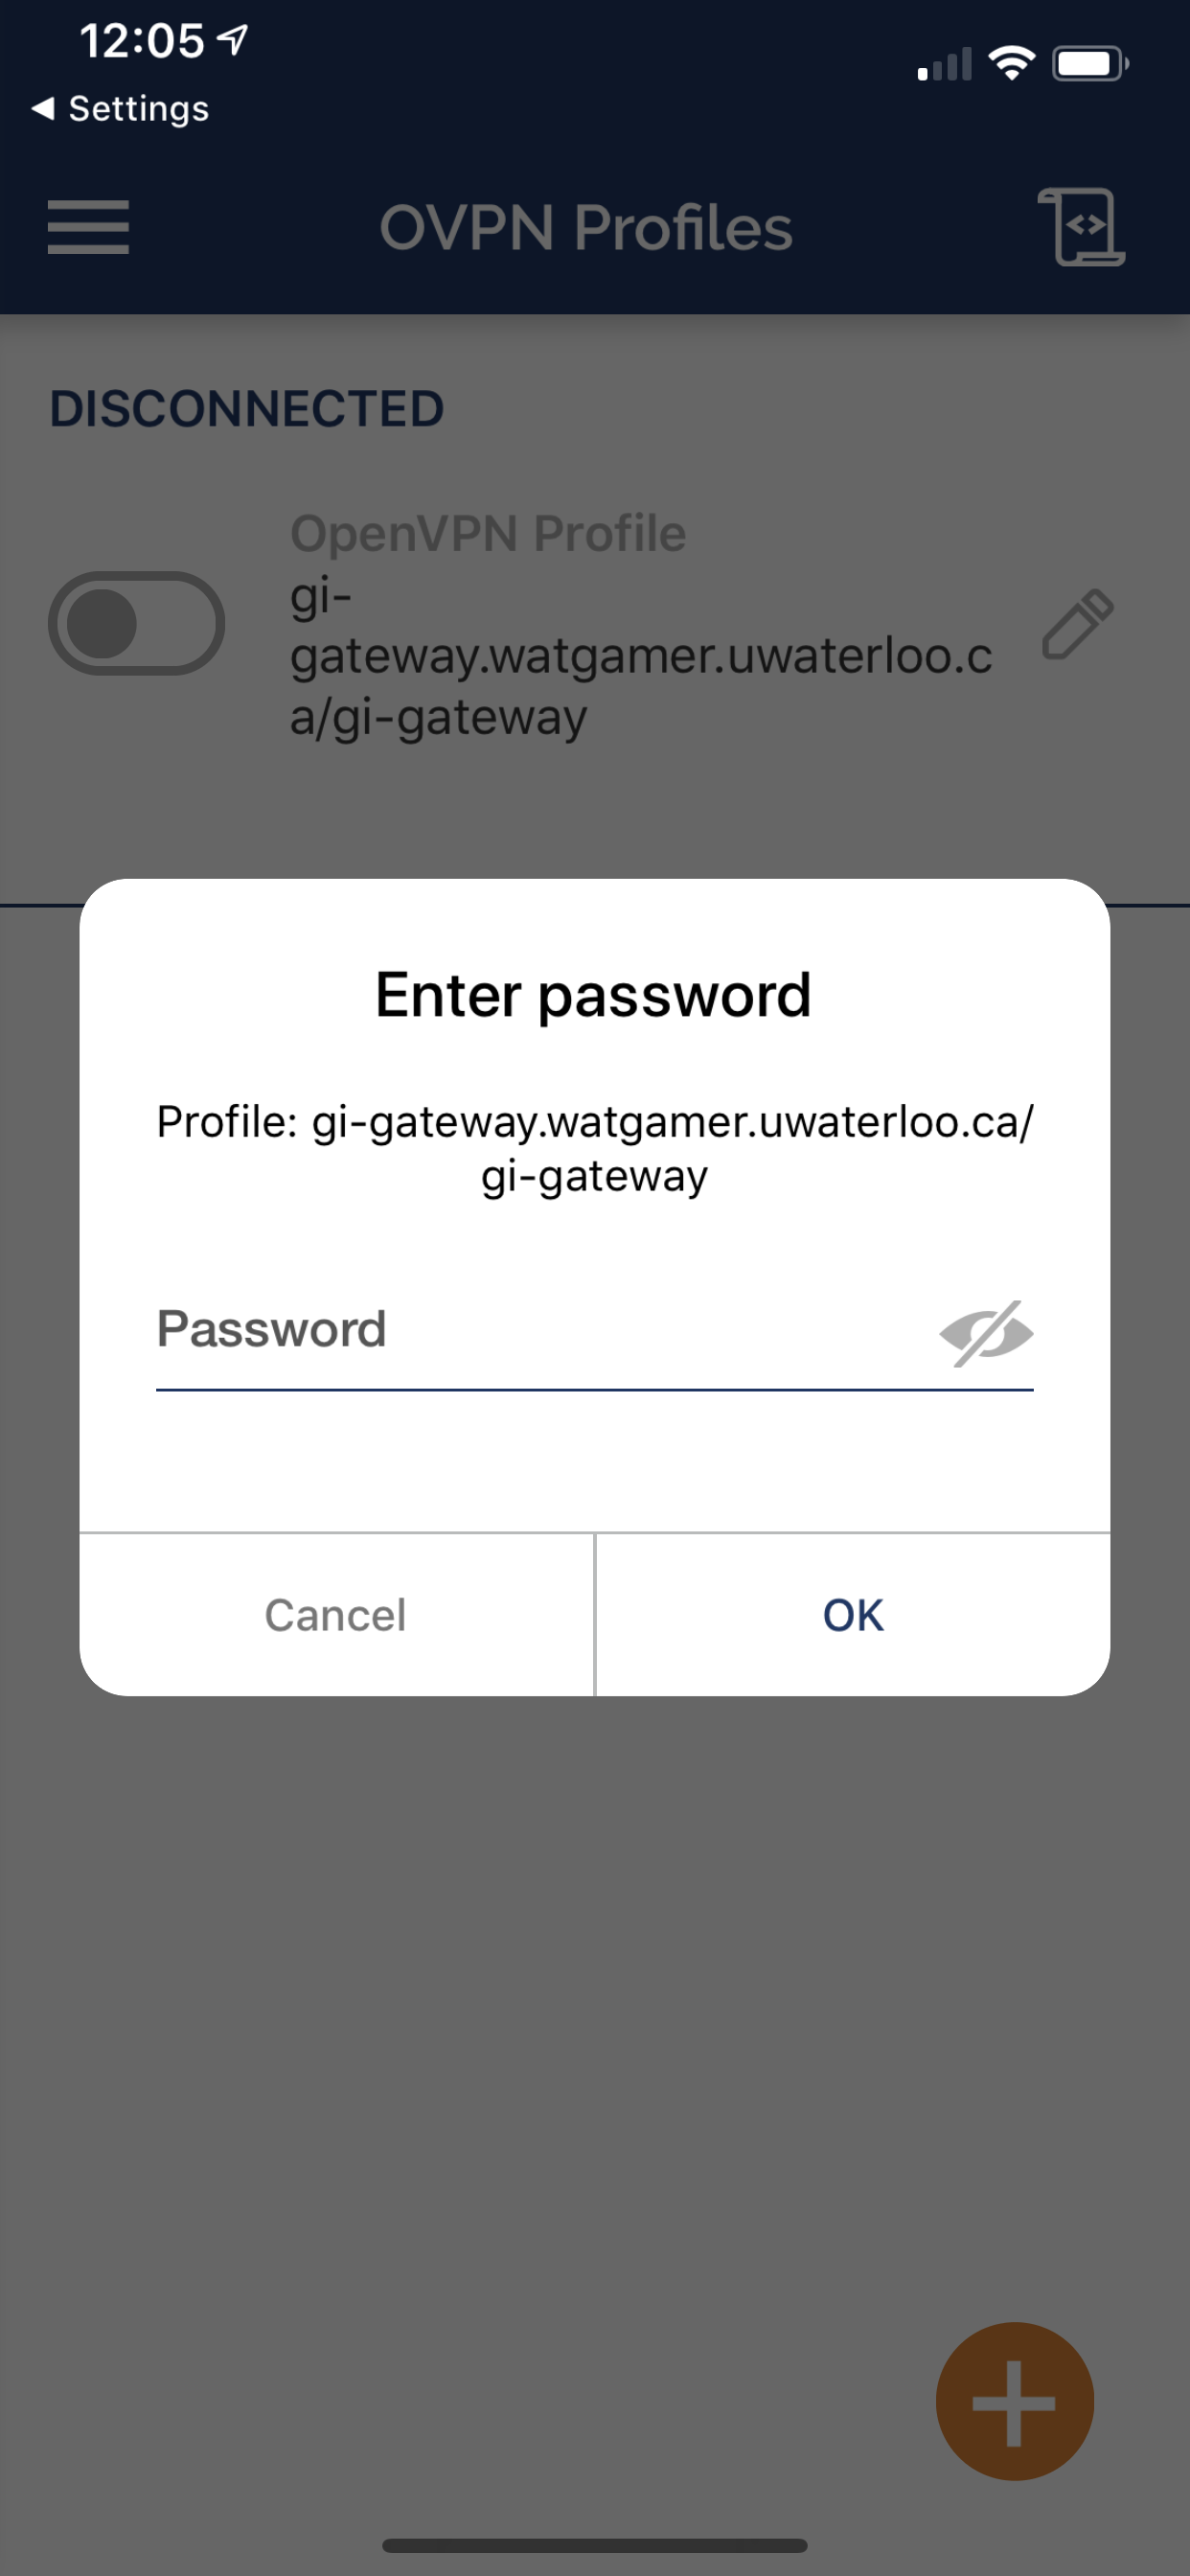
- Toggle the switch next to the profile to start the connection. If you did not save your password, you will be prompted to enter one.
If you were unable to connect, you should see something similar to this:

If you see this, double-check that you entered your credentials properly!
- If you successfully connect, you should see the following:
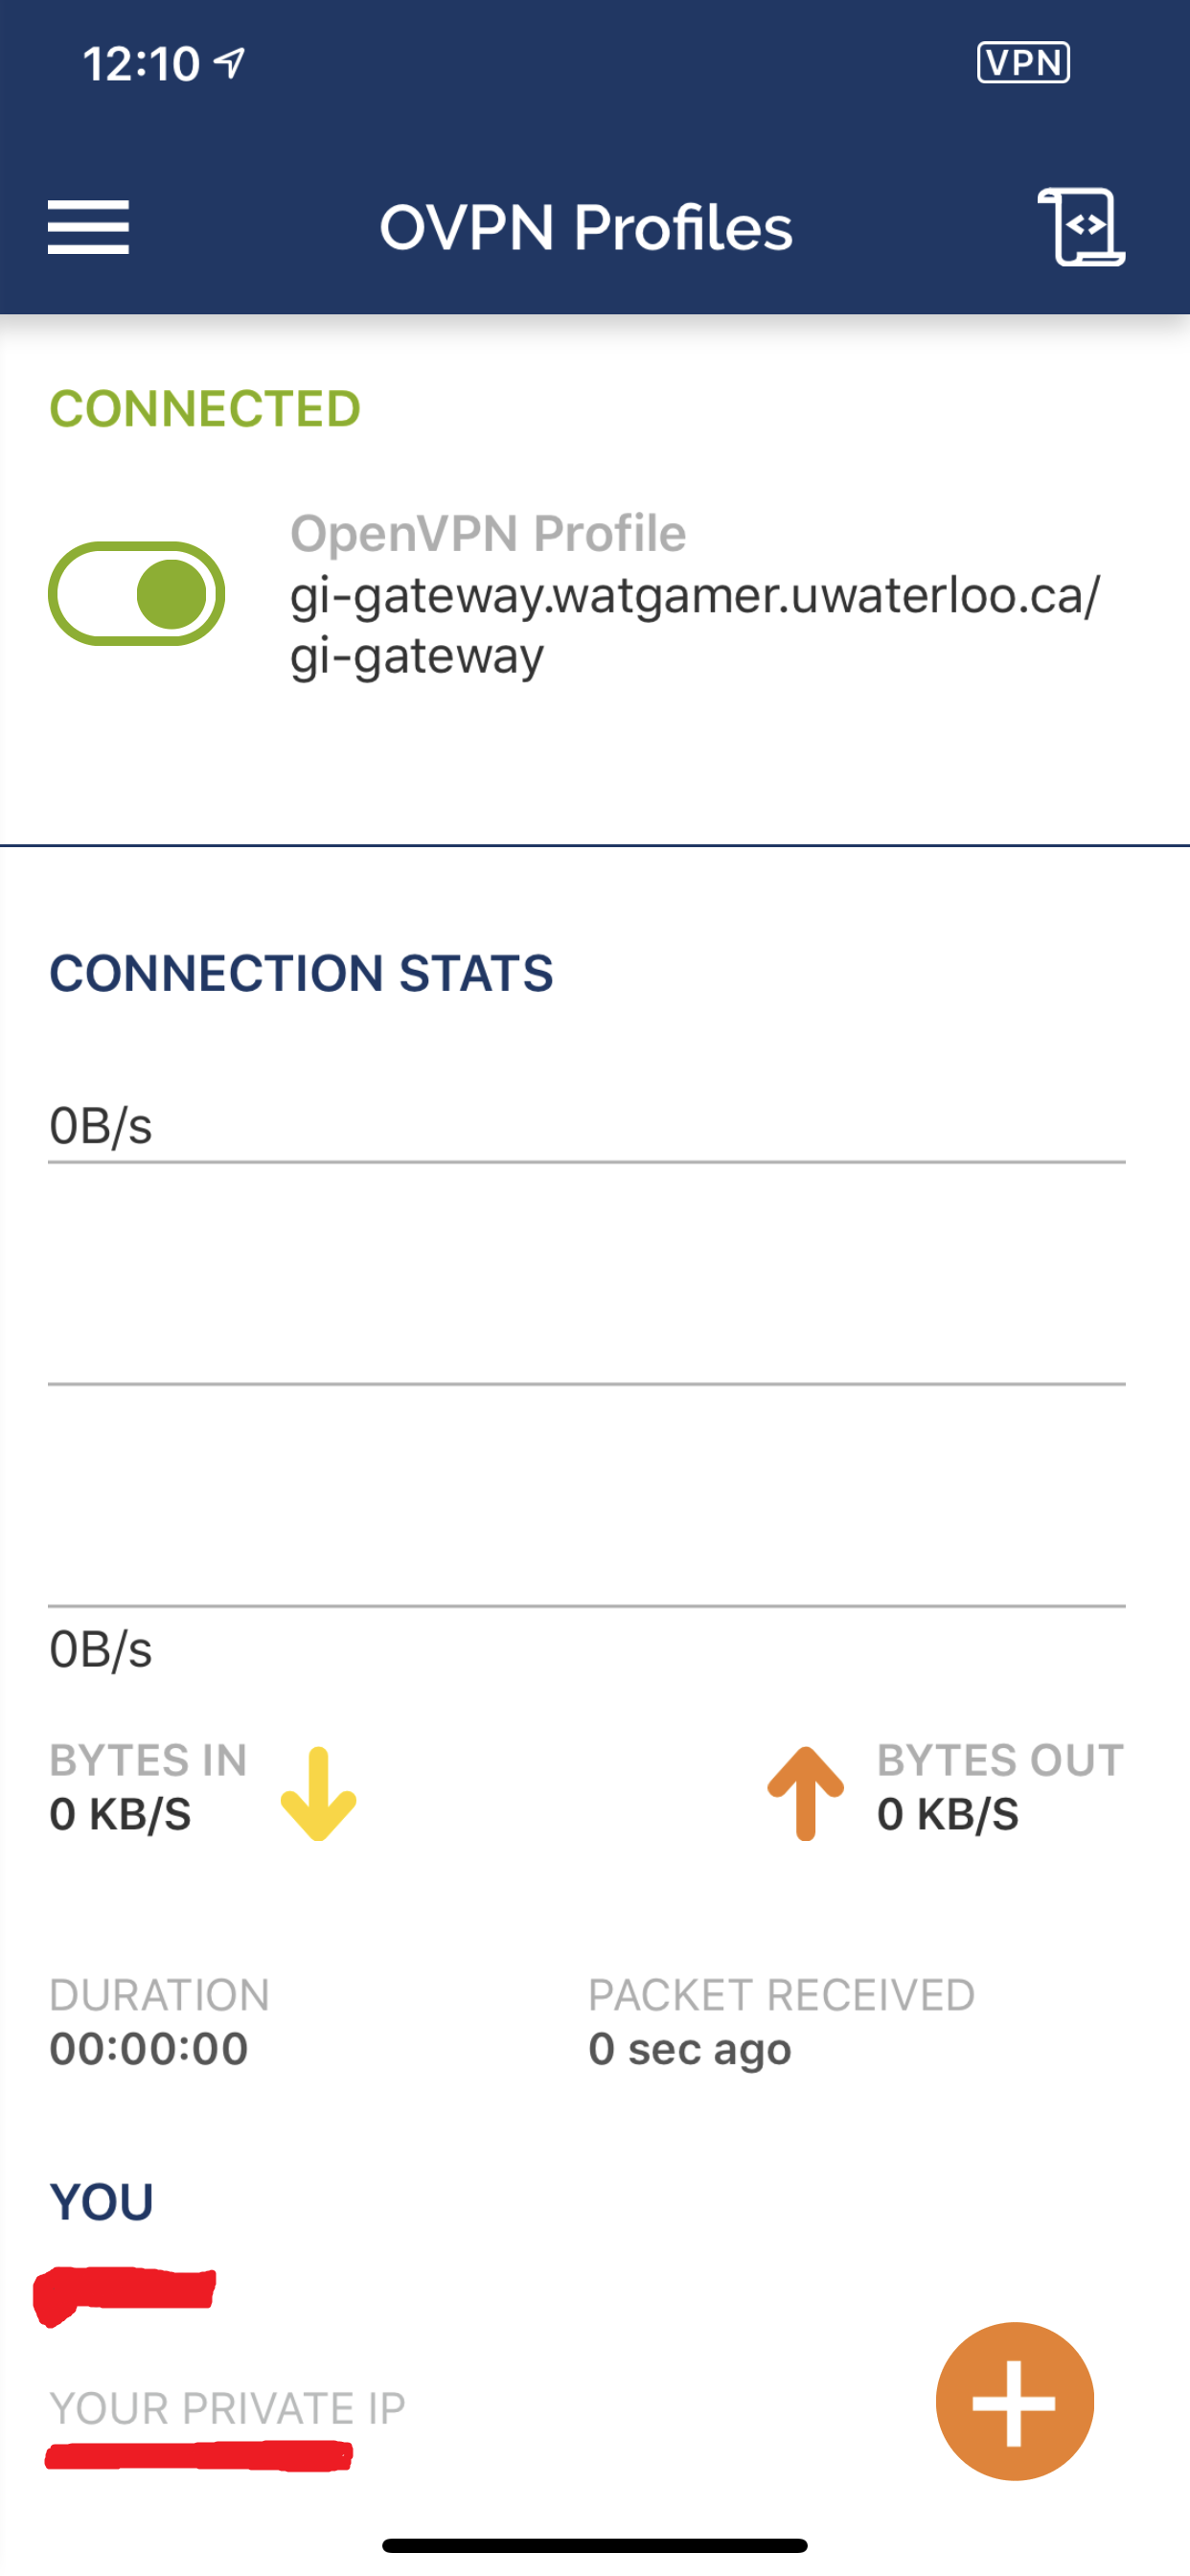
NOTE: You will see this icon next to the wifi icon for the duration that you are connected to the VPN:

Top
Connecting with Android
NOTE: Android versions below 6.0.1 are NOT supported for full DNS redirection.
- First, download the OpenVPN for Android App from the Google Play Store. When prompted, press Allow to allow the app to access Photos/Media/Files.
- Next, download the VPN client configuration file gi-gateway.ovpn and save them to your device..
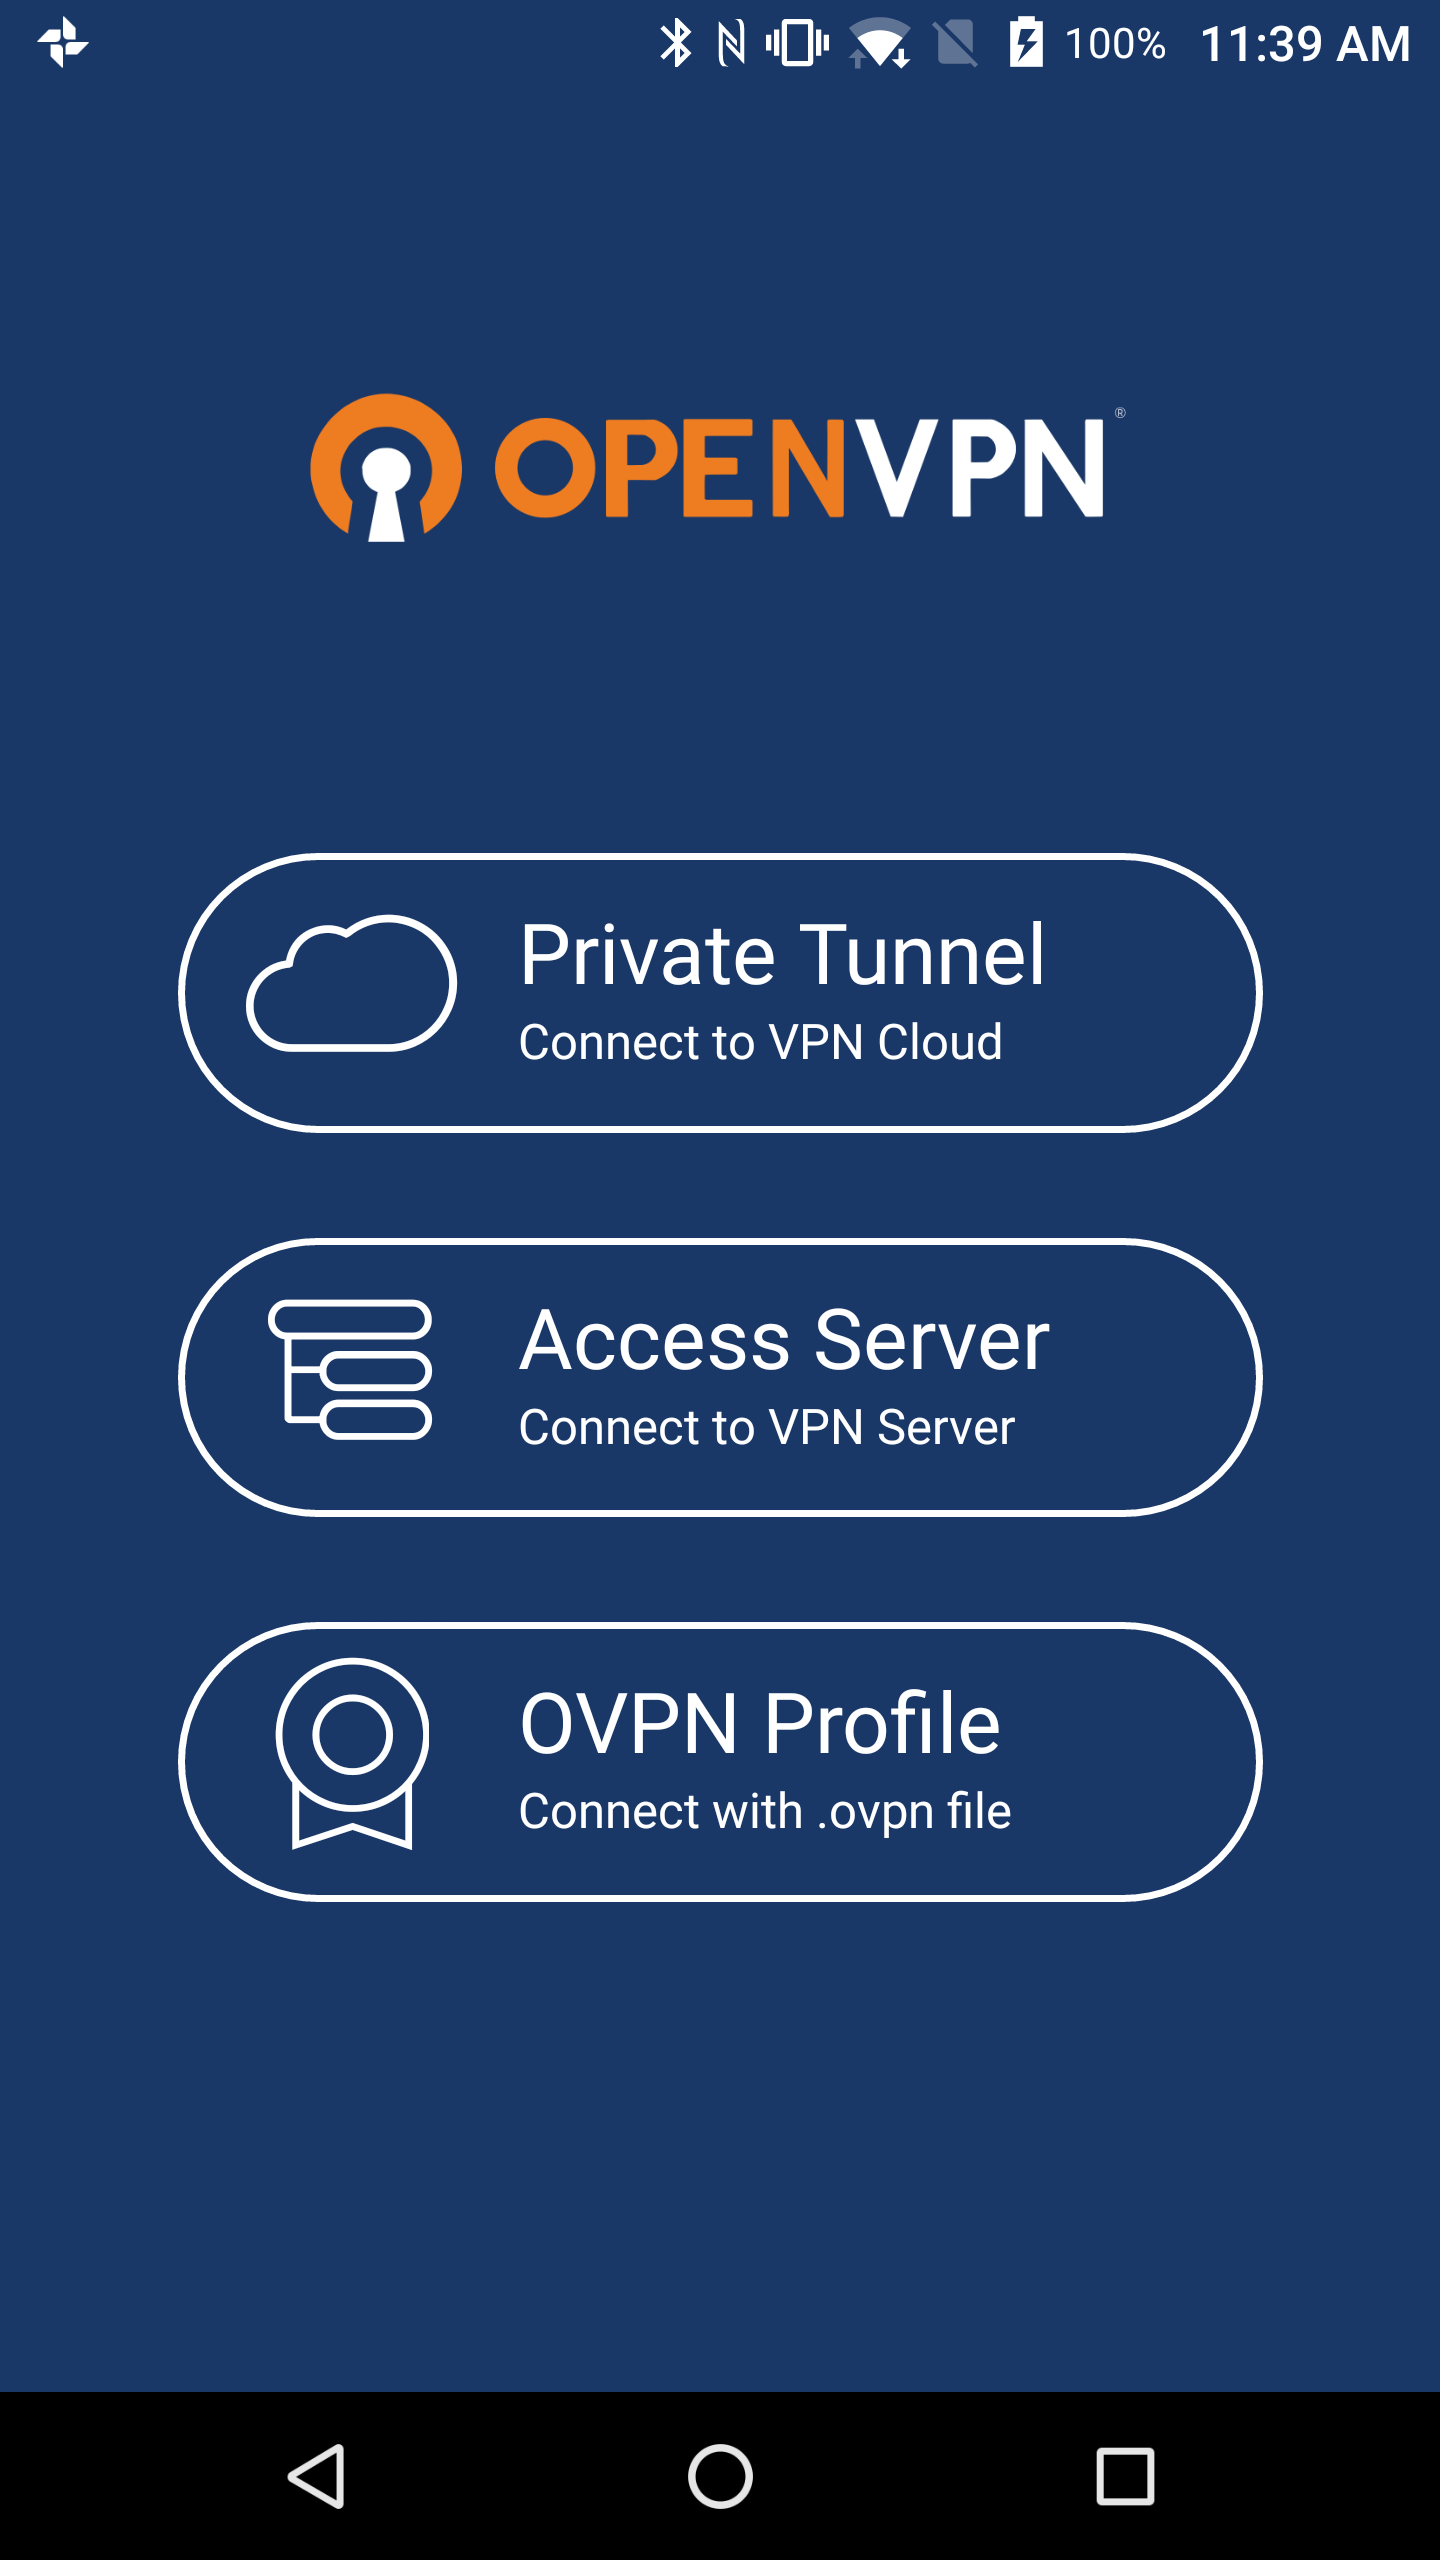
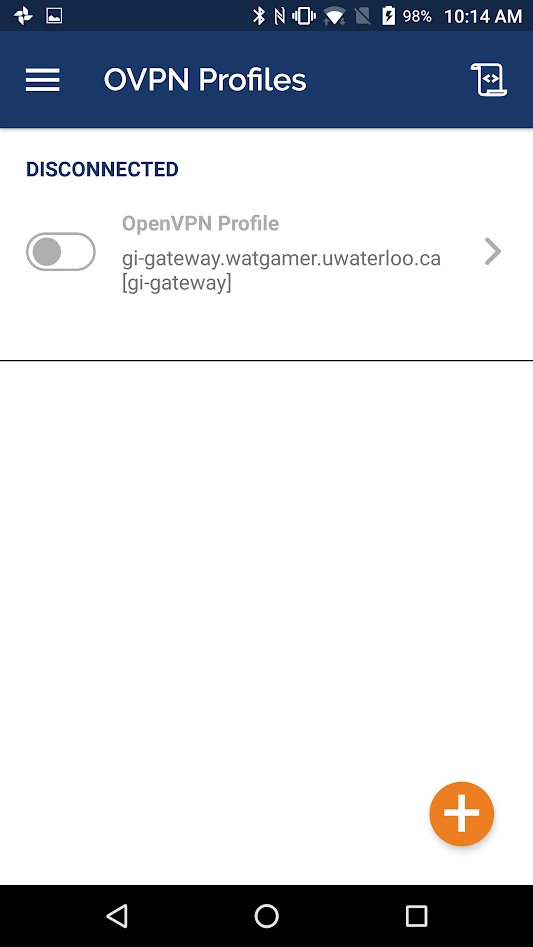
- Open the OpenVPN app you downloaded earlier. You will be greeted with a landing page like the one below. Select OVPN Profile.
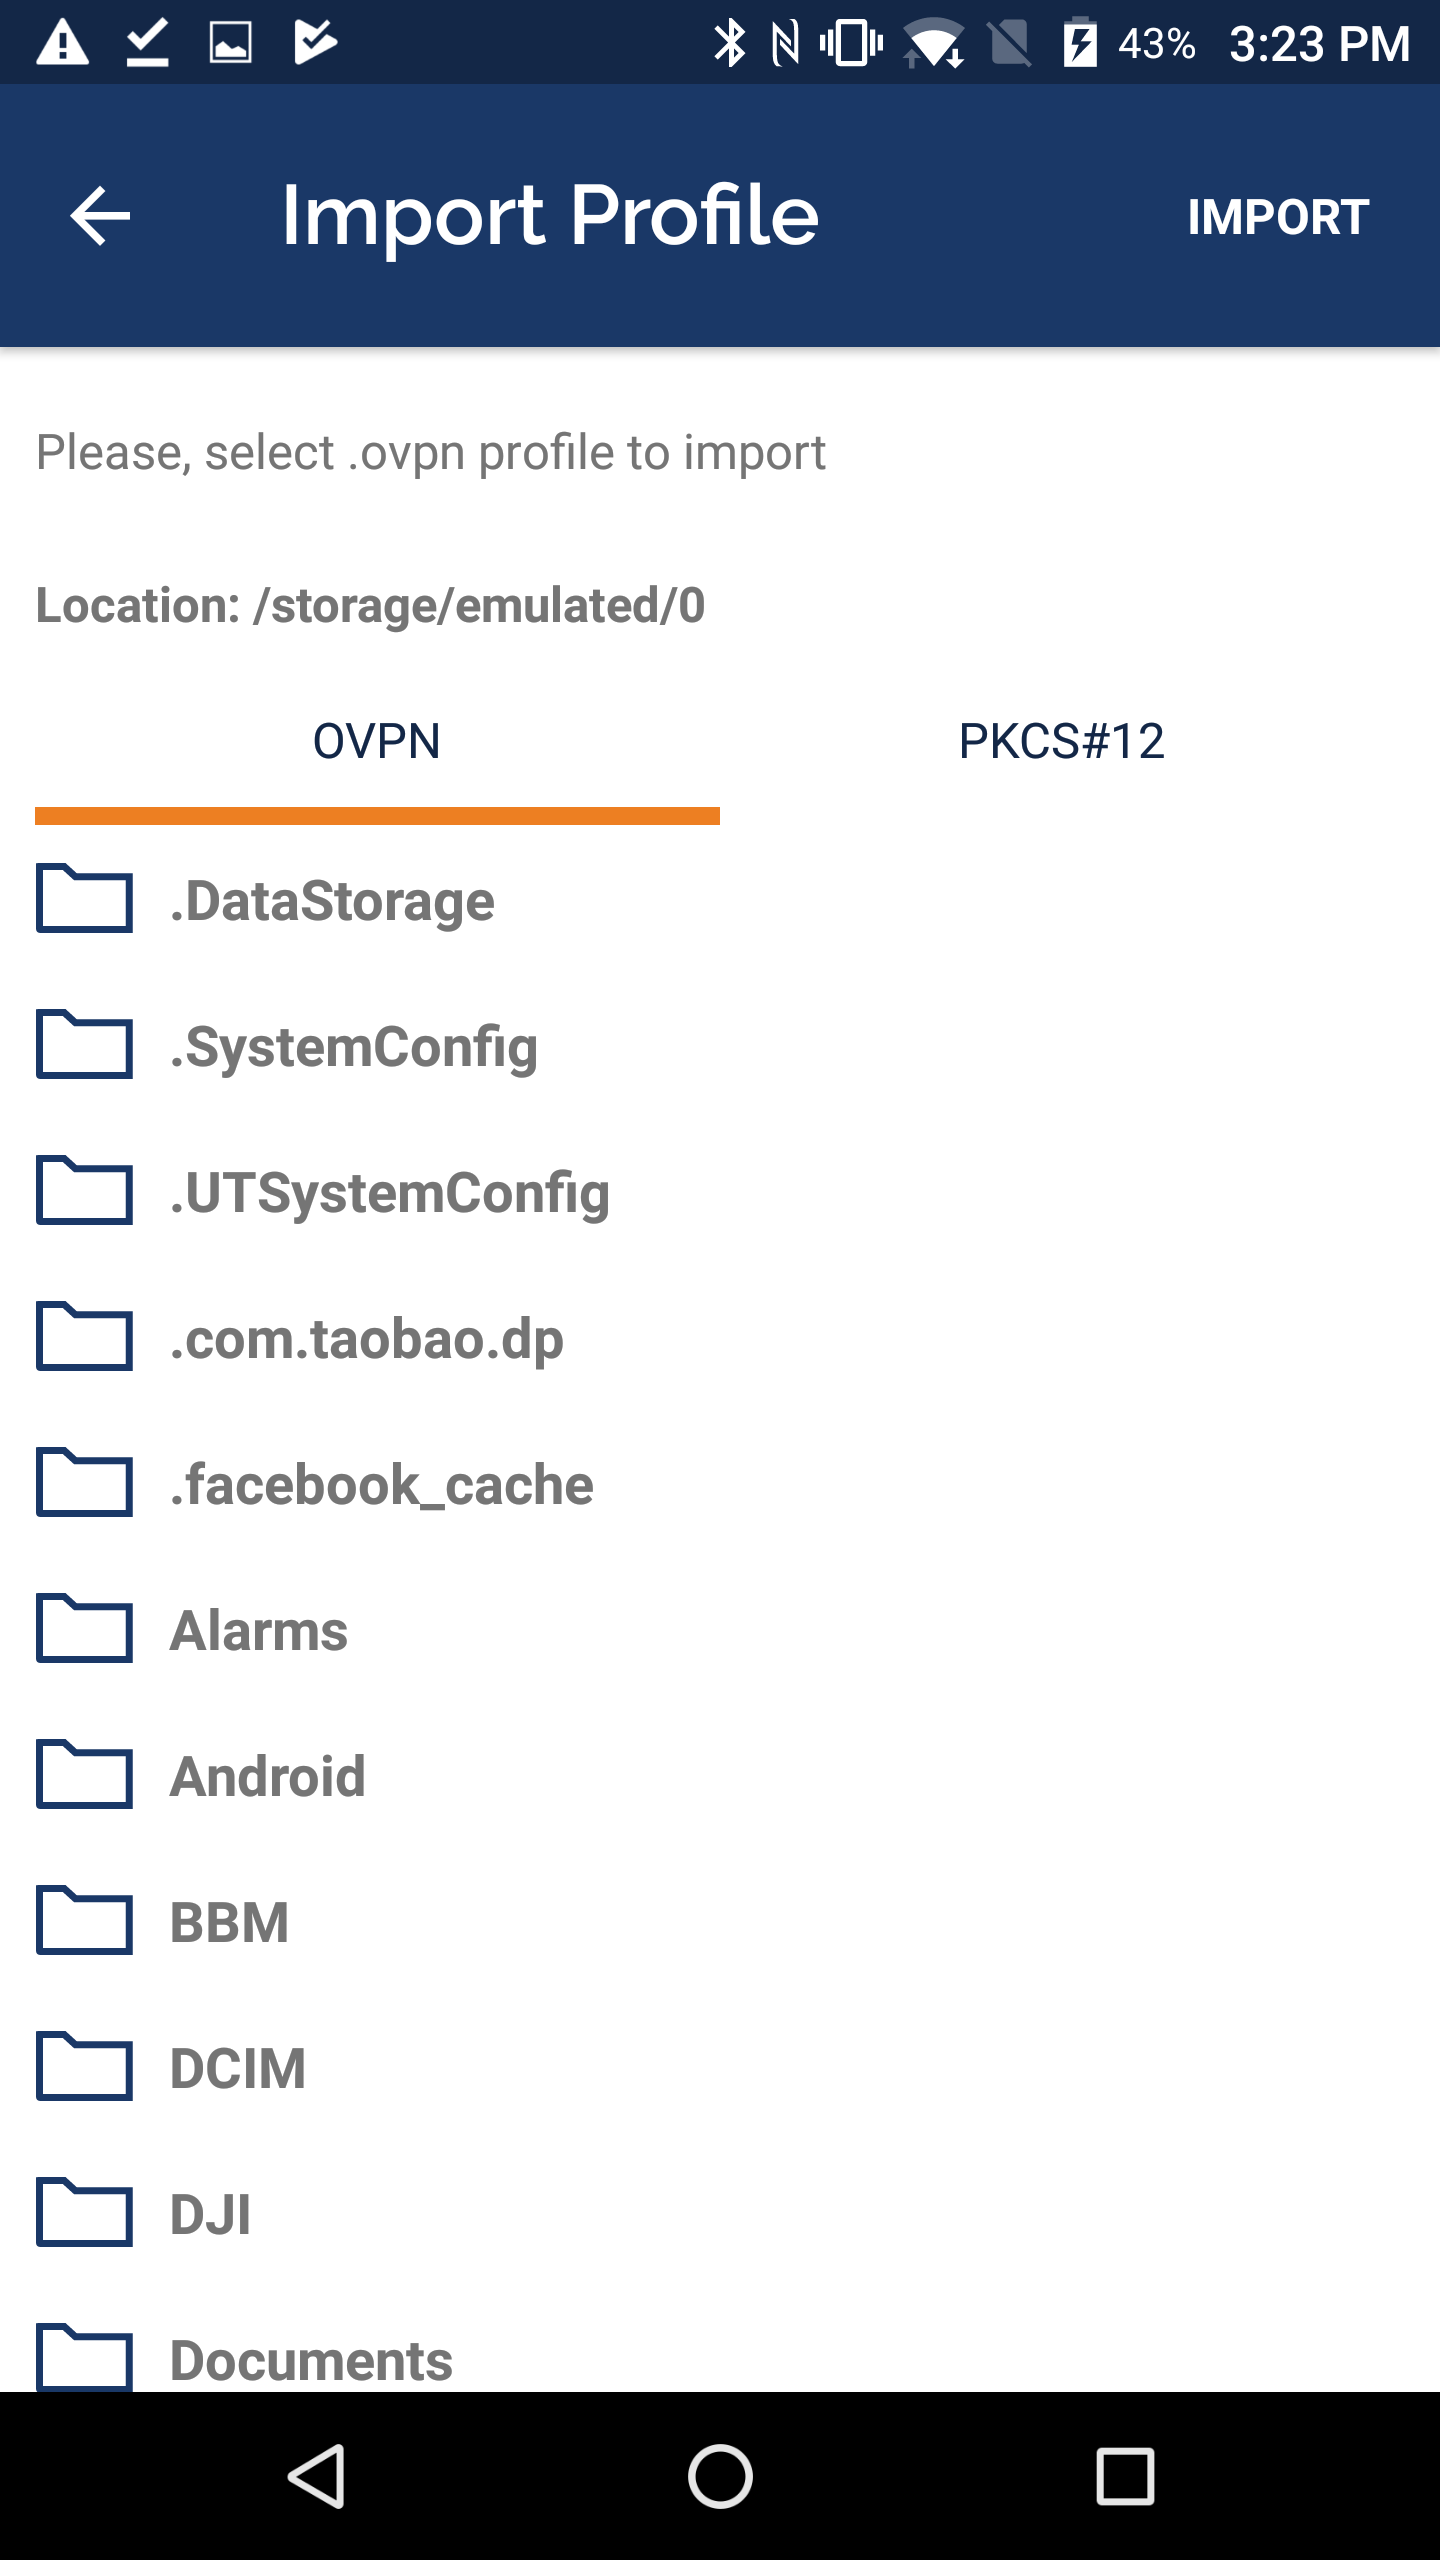
- Navigate to where you saved the gi-gateway.ovpn profile. If the .ovpn file is in your Recents, press it. If it is not, it could be in Internal Storage -> Download. Press the file. This will import it into the app. You will then be greeted with a screen like below. Feel free to name the profile to something that describes what it is, then either press the checkmark in the top right or the orange circle in the bottom right.
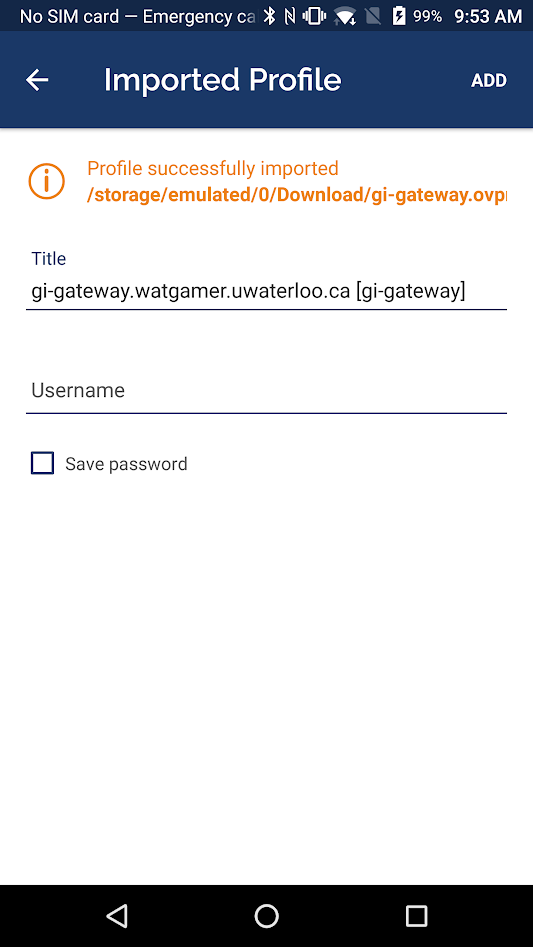
If the .ovpn file is in your Recents, press it. If it is not, it could be in Internal Storage -> Download. Press the file. This will import it into the app. You will then be greeted with a screen like below. Feel free to name the profile to something that describes what it is, then fill in the username with your WatGamer (NOT WatIam/Nexus/Quest). Click on Add in the top right to same the profile.
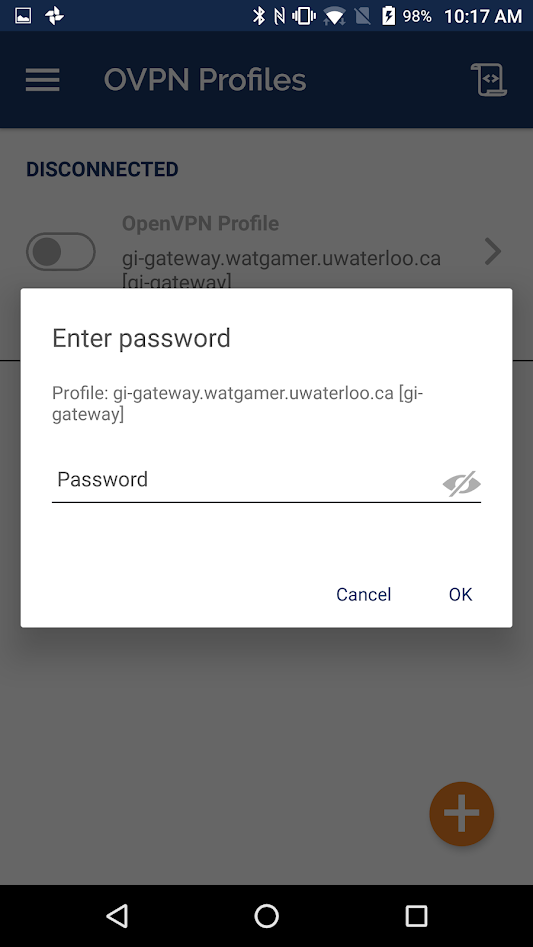
- You will then be greeted by the following screen. Press the newly created profile.
Once pressed, you will be greeted by a window asking you to enter your password. Enter your WatGamer password (NOT WatIam/Nexus/Quest). Press Ok.
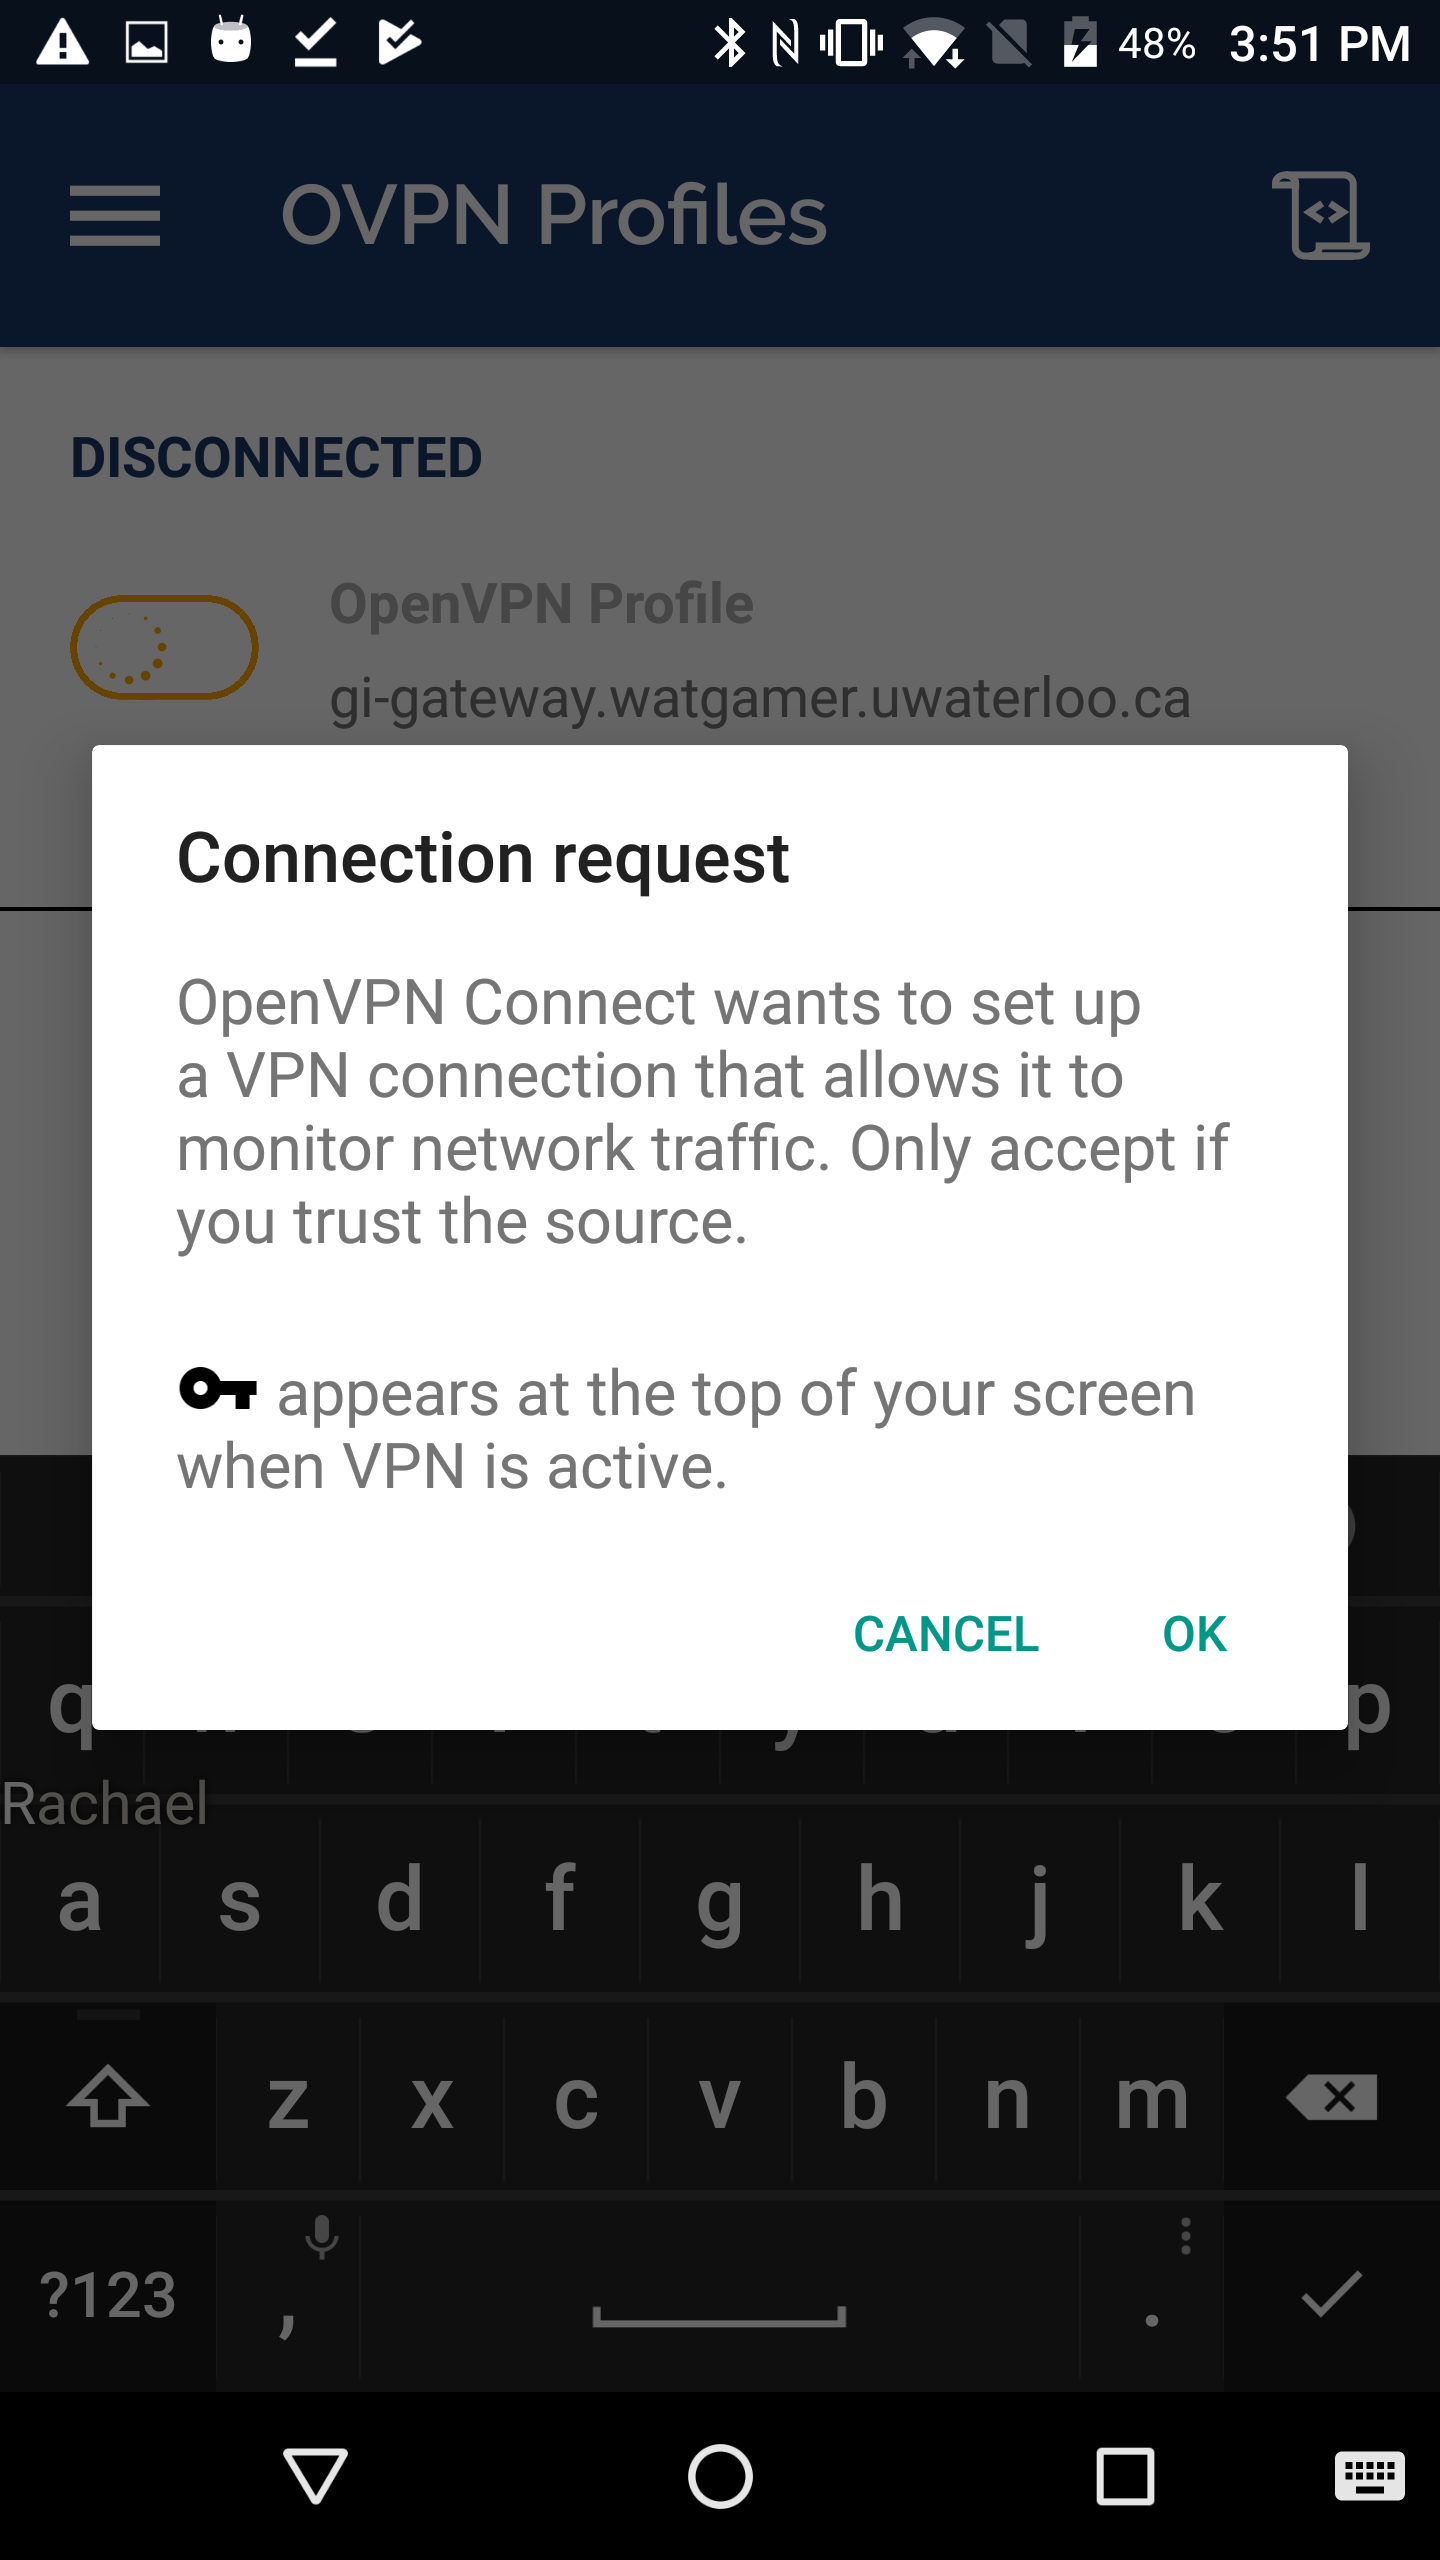
- After entering your password, you will be prompted to allow the creation of a VPN connection.
Press OK to allow it.
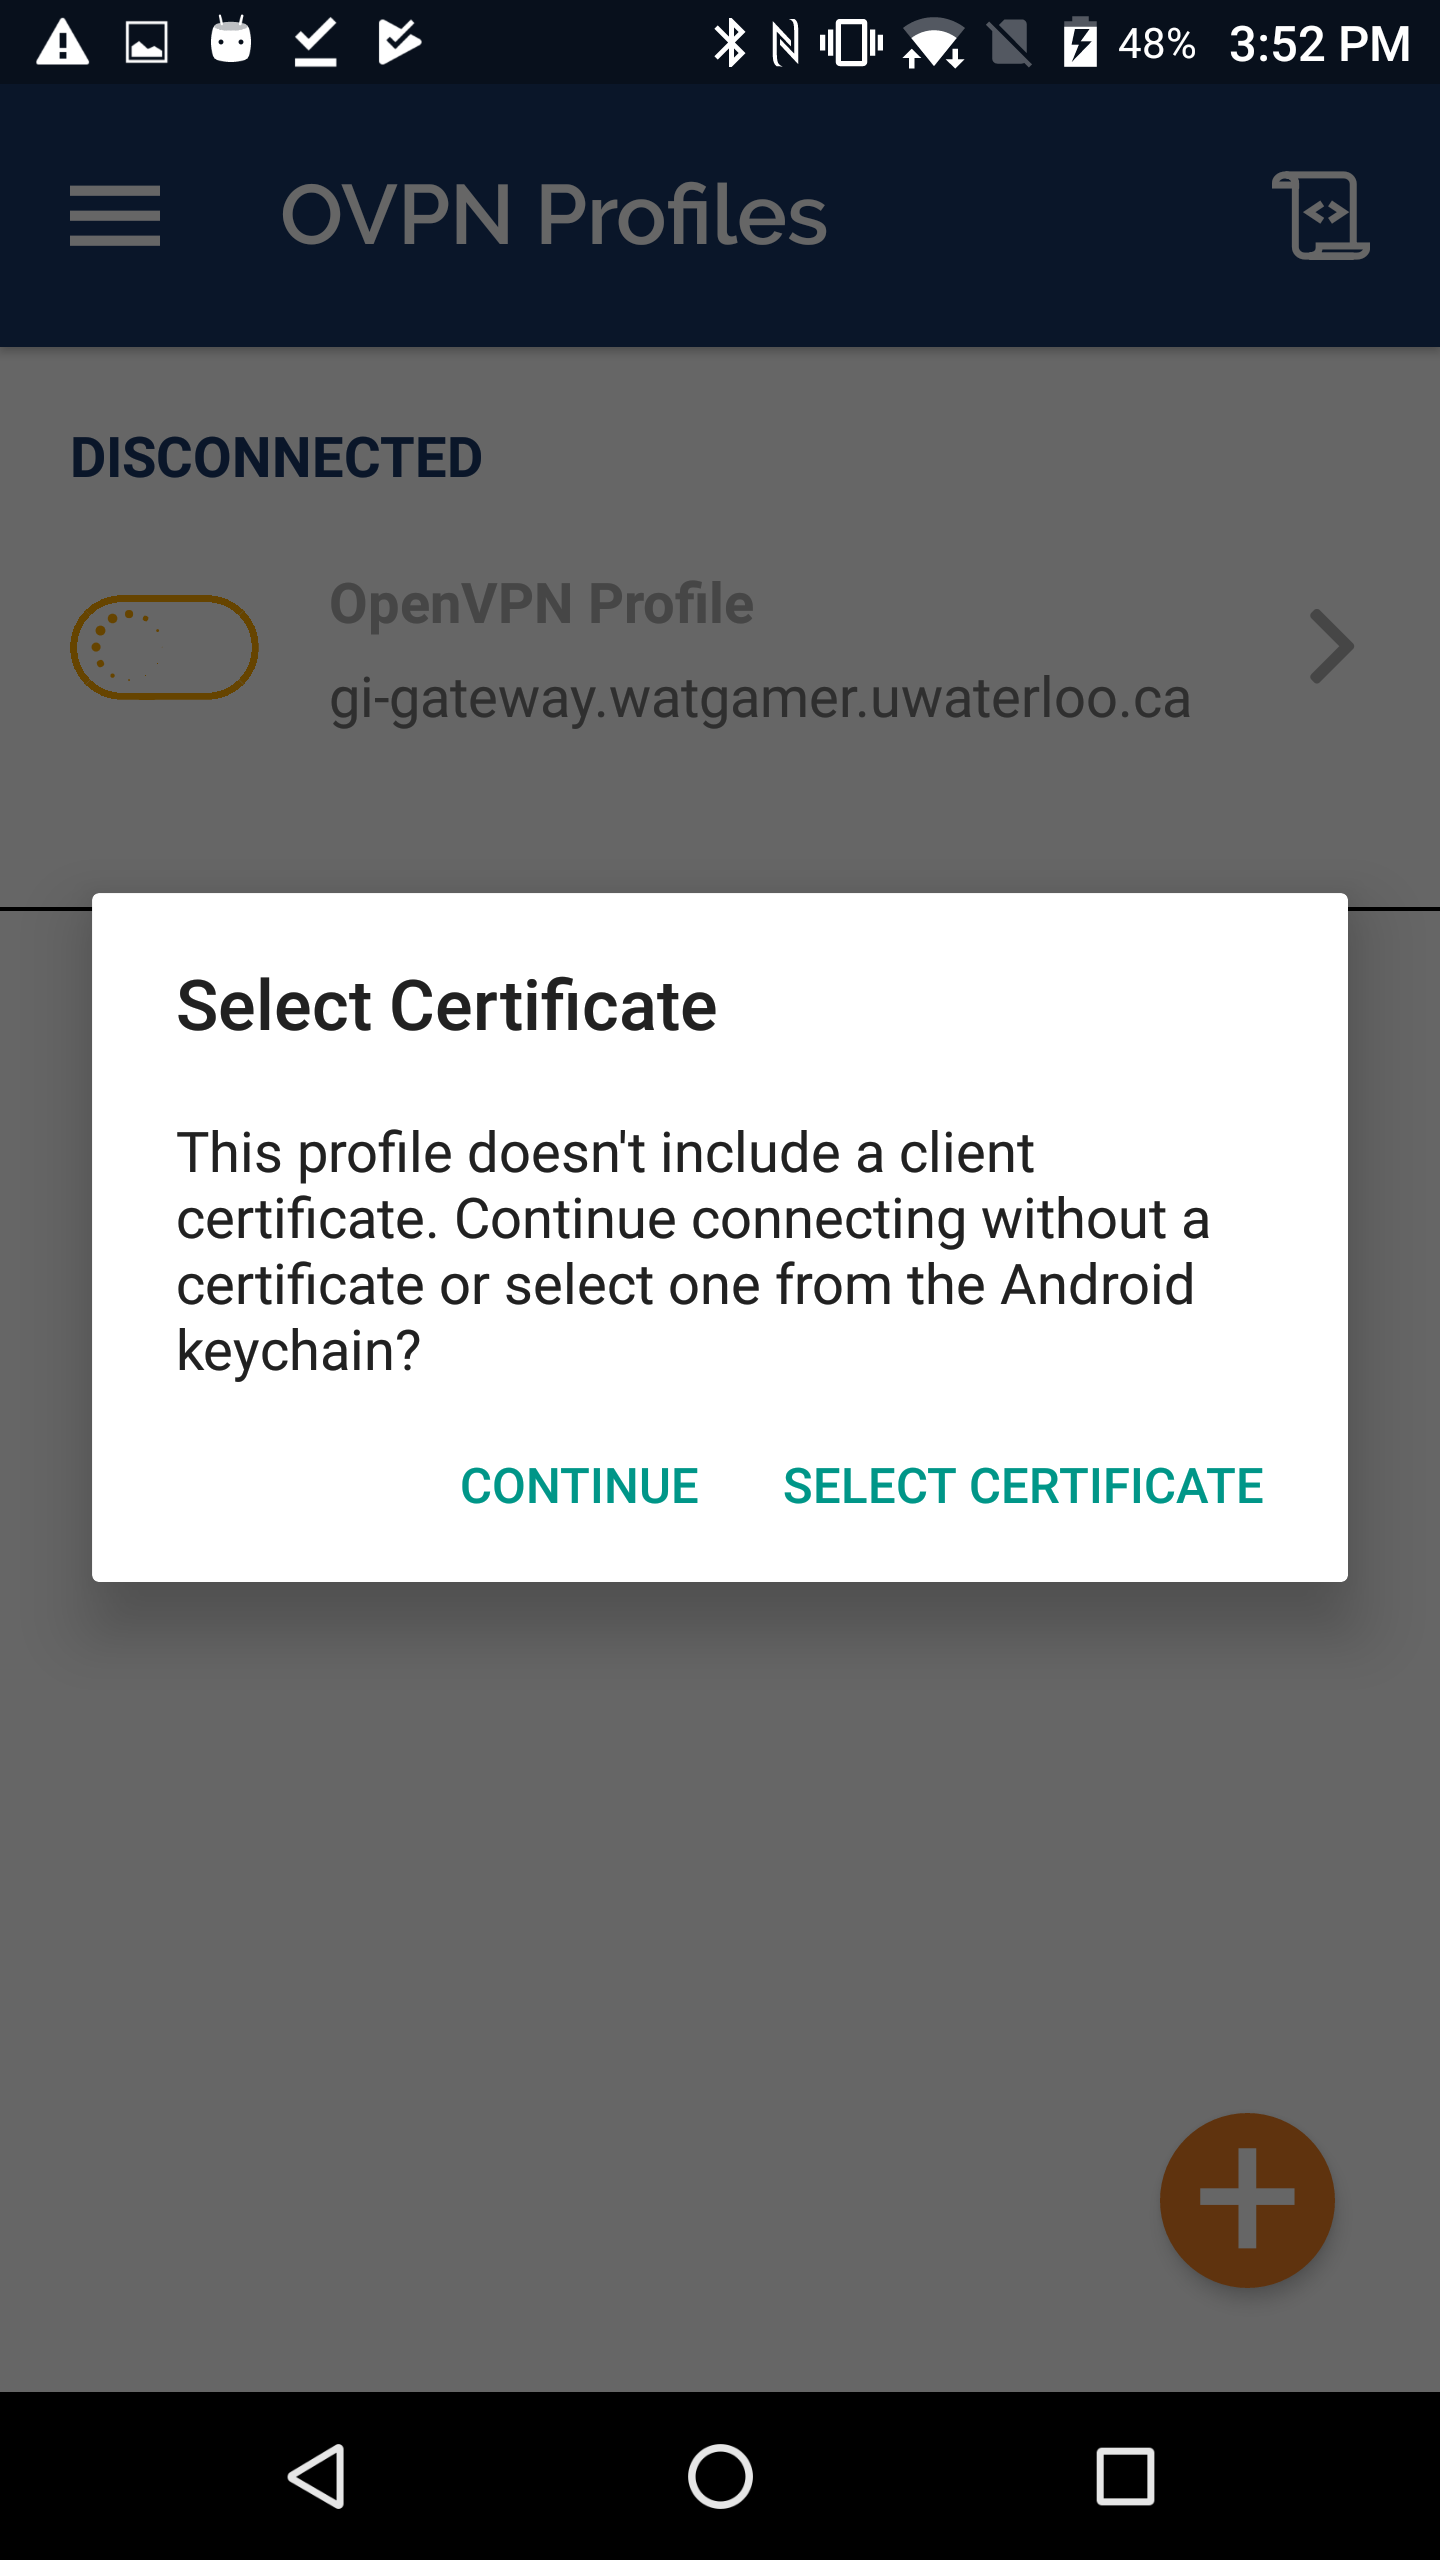
- You will then be prompted to select the certificate. Click Continue.
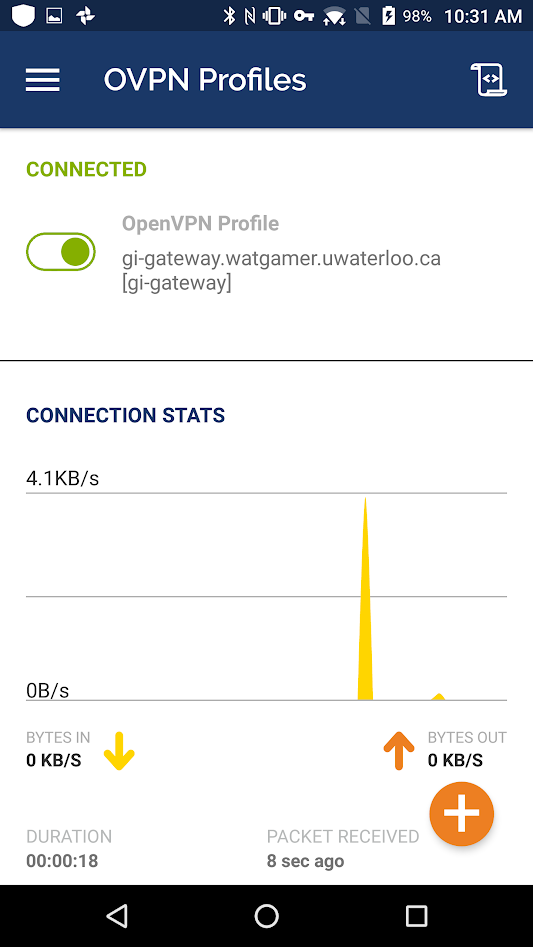
- If you are able to connect, you should see something similar to this:
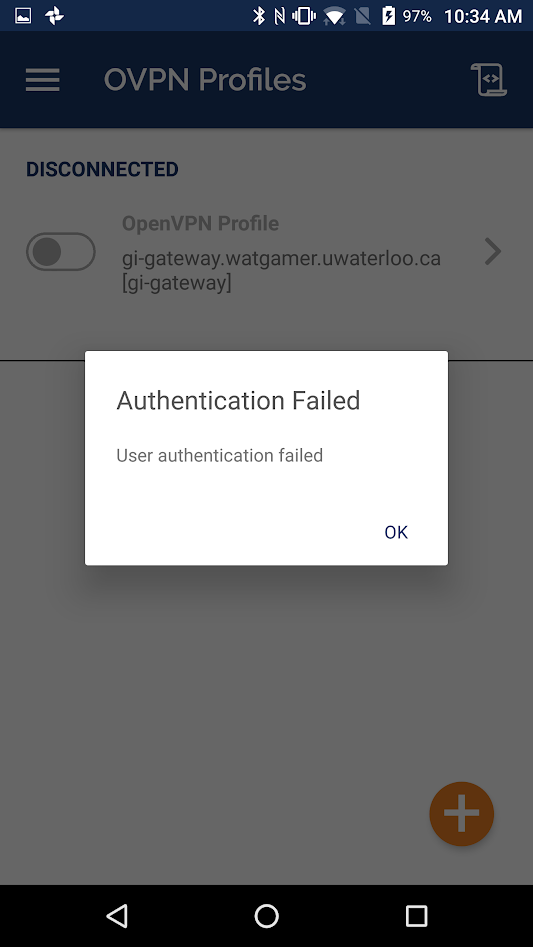
If you were unable to connect, you should see something similar to this:
- To disconnect, you just press the profile. A window will prompt you to Disconnect. Click OK to disconnect or cancel to keep the connection open.
